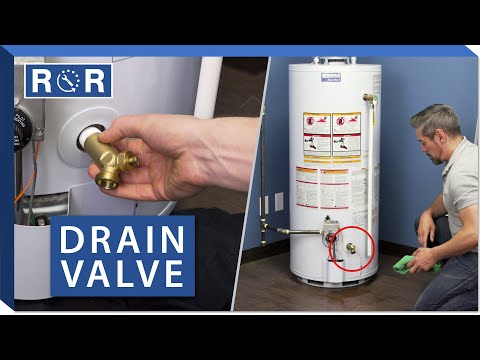
Water Heater - Drain Valve
Understanding Your Water Heater’s Drain Valve: The Small Part That Prevents Big Disasters
When you think about home maintenance, your water heater probably doesn’t cross your mind very often—until it stops working or, worse, springs a major leak. Tucked away near the bottom of the tank is a small yet crucial component: the water heater drain valve. While it looks unassuming, this little valve plays a massive role in keeping your appliance running efficiently and extending its lifespan.
Over time, minerals, sediment, and rust build up at the bottom of your water heater tank. If left unaddressed, this sediment layer creates a barrier between the heating element and the water, forcing your unit to work harder, run up your energy bills, and eventually fail prematurely. That is why knowing how your drain valve works—and knowing when to replace it—is essential for every homeowner.
Signs That Your Water Heater Drain Valve Needs Attention
Like any mechanical part, a water heater drain valve can wear out, corrode, or get jammed with mineral deposits. Ignoring a faulty valve can lead to frustrating leaks or even a flooded basement. Here are the most common signs that your drain valve is failing:
- Active Leaks or Dripping: If you notice water pooling around the base of the tank, the valve may no longer be sealing properly.
- Stuck or Broken Handle: If you try to open the valve for routine maintenance and the handle spins freely or refuses to budge, the internal mechanism is likely ruined.
- Discolored Water: A clogged valve often goes hand-in-hand with heavy sediment buildup, which can cause rusty or discolored water to flow from your taps.
If your valve is leaking or broken, don't panic. Replacing it is a straightforward DIY project if you have the right tools and follow the correct steps. For a visual walkthrough of the replacement process, check out this helpful water heater drain valve repair video, which guides you through the process step-by-step.
How to Safely Replace a Faulty Drain Valve
If you've determined that your drain valve needs to be swapped out, preparation is key. Safety always comes first when working with plumbing and electrical appliances. Here is a brief overview of what the replacement entails:
- Shut Off the Utilities: Turn off the power supply to an electric water heater at the breaker box, or switch the gas valve to the "pilot" or "off" position for a gas unit. Next, shut off the cold water supply valve leading into the top of the tank.
- Drain the Tank: Attach a garden hose to the drain valve, run the other end to a safe drainage area (like a floor drain or outside), and open a hot water faucet somewhere in the house to allow air into the system. Open the drain valve to empty the tank completely.
- Remove the Old Valve: Once the tank is empty, use a wrench to carefully unscrew the old drain valve counter-clockwise. Be prepared for a small amount of residual water to spill out.
- Install the New Valve: Wrap the threads of the new valve with plumber's tape (Teflon tape) to ensure a watertight seal. Screw the new valve into the tank clockwise, making sure not to overtighten it, as this can strip the threads.
- Refill and Test: Close the new drain valve, turn the cold water supply back on, and let the tank fill up completely *before* turning the power or gas back on. Once full, check the new valve for any signs of leaks.
Upgrade to Brass for Long-Lasting Durability
Many older water heaters—and even some budget-friendly modern models—come equipped with factory-installed plastic drain valves. While functional at first, these plastic valves are notoriously fragile and prone to snapping or leaking over time, especially when exposed to high heat and heavy mineral deposits.
If you are replacing your drain valve, we strongly recommend upgrading to a heavy-duty brass ball valve. Brass is significantly more durable, less prone to cracking, and provides a much tighter seal. Making this small upgrade will save you from future headaches and make your next annual flush a breeze.
Keep Your Water Heater Flowing Smoothly
Routine maintenance is the best defense against premature water heater failure. By making it a habit to inspect your drain valve annually and flushing out accumulated sediment, you can keep your appliance operating at peak efficiency for years to come.
If your DIY repair requires more than just a valve replacement, or if you need help finding the exact OEM replacement parts for your specific water heater model, we’ve got you covered. Explore our inventory of reliable appliance parts to find everything you need to keep your home running smoothly.