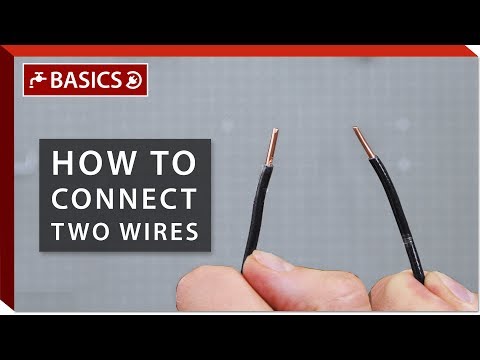
How To Connect Two Wires
Introduction: Why You Need to Know How to Connect Wires
Whether you are fixing a dryer that won't heat, replacing a burnt terminal on an oven element, or repairing a severed wire inside a washing machine, knowing how to connect two wires safely and securely is a fundamental skill for any DIY appliance repair project. Over time, the vibration, heat, and moisture inside appliances can cause wiring connections to break or deteriorate. Learning how to splice and connect wires properly not only saves you money on service calls but also ensures your appliance operates safely for years to come.
Safety First: The Golden Rules of Appliance Repair
Before you touch any electrical components, safety must be your absolute top priority. Always unplug the appliance from the wall outlet or shut off the corresponding circuit breaker at your home's main electrical panel. Once the power is disconnected, use a non-contact voltage tester to verify that the wires you are working on are completely dead. Never skip this step, as residual electricity or incorrectly labeled breakers can lead to severe electrical shock.
Essential Tools and Materials
To make a professional-grade wire connection that can withstand the heat and vibration of modern appliances, you need the right tools. Avoid using household scissors or pliers to strip wires, as they can damage the delicate copper strands inside. Instead, gather the following essentials:
Wire Strippers: Designed to cleanly cut through plastic insulation without cutting the underlying copper wire.
Crimp Connectors or Wire Nuts: Butt connectors (splice connectors) are ideal for inline wire repairs, while wire nuts are perfect for joining wires at a junction.
Crimping Tool: This tool applies the perfect amount of pressure to secure crimp connectors to the wire.
Heat Shrink Tubing or Electrical Tape: High-quality insulation is crucial to protect the exposed metal from moisture and short circuits.
Step-by-Step Guide to Splicing and Connecting Two Wires
Step 1: Prep and Strip the Wires. Begin by cutting away any damaged or burnt sections of the wires. Slide a piece of heat-shrink tubing onto one of the wires and push it back so it is out of the way for now. Next, select the correct gauge slot on your wire strippers, place the wire in the slot, and squeeze. Pull the strippers toward the end of the wire to remove about 1/2 inch of the plastic insulation, exposing the clean copper strands underneath. Repeat this on the second wire.
Step 2: Choose the Right Connection Method. For most appliance repairs, crimp-on butt connectors are the gold standard. They provide a mechanically strong connection that won't shake loose during a high-speed spin cycle. If you are working inside a junction box, UL-listed wire nuts are also acceptable. Twist the exposed copper strands of each wire clockwise to keep them tight and prevent fraying.
Step 3: Secure the Connection. Insert the stripped end of the first wire into one side of the butt connector until the copper is fully seated in the metal sleeve. Place the connector in the crimping tool and squeeze firmly to lock the wire in place. Insert the second wire into the opposite end of the connector and repeat the crimping process. Give both wires a gentle tug to ensure they are locked tight and won't pull out.
Step 4: Insulate and Protect. Slide the heat-shrink tubing back over the finished crimp connection, ensuring it covers the connector and extends onto the original wire insulation on both sides. Use a heat gun or a lighter (held a safe distance away) to gently apply heat until the tubing shrinks tightly around the splice. This creates a moisture-resistant, insulated barrier.
Watch and Learn: Visual Wire Connection Guide
If you are a visual learner, seeing the physical mechanics of stripping and crimping wires can make all the difference. We highly recommend watching this helpful instructional video on wire connection techniques. This video demonstrates the exact hand movements, tool placements, and safety practices required to execute a perfect wire splice every time.
Common Mistakes to Avoid
When connecting wires in high-heat or high-vibration appliances, small mistakes can lead to big hazards, including appliance failure or electrical fires. Avoid these common pitfalls:
Using the wrong wire gauge: Always match the gauge (thickness) of the replacement wire and connectors to the original appliance wiring. Using a wire that is too thin can cause overheating.
Using low-quality electrical tape: Standard electrical tape can degrade and unravel over time due to the high temperatures inside dryers and ovens. Always use heat-shrink tubing or high-temp electrical tape for appliance repairs.
Leaving exposed copper: Ensure no bare copper wire is visible outside of the connector or insulation. Exposed metal can contact the appliance's metal cabinet, causing a direct short circuit.
Conclusion
Connecting two wires is a straightforward DIY task once you understand the basic principles of stripping, crimping, and insulating. By taking your time, using the correct tools, and prioritizing safety, you can confidently repair damaged wiring in your household appliances. If you discover that your appliance needs a replacement wiring harness, terminal block, or specialized DIY tools, we have everything you need to get the job done right. Keep your appliances running safely and efficiently with the right parts and the right know-how!