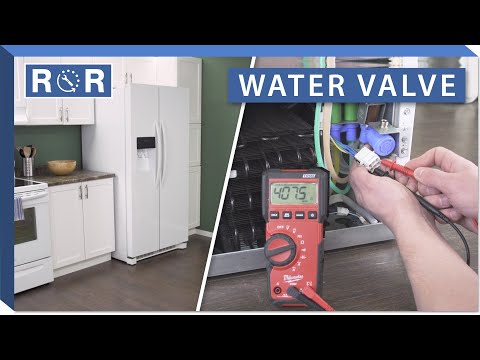
Refrigerator Water Inlet Valve (Testing / Replacement)
Is Your Refrigerator's Water Inlet Valve Causing Trouble? Here's How to Test and Replace It!
Is your refrigerator refusing to dispense water, or has your ice maker gone on strike? Perhaps you've noticed an annoying drip or even a small puddle under your fridge. These frustrating issues often point to one culprit: the refrigerator water inlet valve. This unsung hero controls the flow of water to your dispenser and ice maker, and when it malfunctions, your convenient cold water supply grinds to a halt.
Don't rush to call a technician just yet! In many cases, testing and replacing a faulty water inlet valve is a manageable DIY repair. This guide will walk you through the process, helping you diagnose the problem and get your fridge back to full functionality.
What is a Refrigerator Water Inlet Valve?
The refrigerator water inlet valve is an electrically operated solenoid valve that connects your home's water supply line to your refrigerator. When you press the dispenser lever or when the ice maker calls for water, the valve opens, allowing water to flow. When the demand stops, the valve closes, shutting off the water supply. It's a critical component for any fridge with water and ice dispensing features.
Signs of a Failing Water Inlet Valve
Before you dive into testing, recognize the common symptoms of a failing water inlet valve:
- No Water from Dispenser: The most obvious sign. You press the lever, but nothing comes out.
- No Ice Production: If your ice maker isn't producing ice, or is producing very little, the valve might not be supplying water.
- Slow Water Dispensing: Water trickles out instead of flowing steadily.
- Continuous Drip or Leak: If the valve fails to close completely, it can cause a slow drip from the dispenser or a leak inside/under the fridge.
- Humming but No Water: You might hear the solenoid attempting to open, but no water flows.
Is Your Water Inlet Valve the Problem? (Testing)
Before you commit to a replacement, it's wise to test the valve to confirm it's the source of your woes. Always prioritize safety!
- Safety First: Unplug your refrigerator from the wall outlet. Turn off the water supply to the refrigerator (usually a small shut-off valve behind or near the fridge).
- Locate the Valve: The water inlet valve is typically found on the back lower section of your refrigerator, where the main water supply line connects. You might need to remove a rear access panel to get to it.
- Inspect for Obvious Issues: Look for visible leaks, corrosion, or cracks around the valve and its connections.
- Test for Continuity (Solenoids): The valve usually has one or two solenoids (coils) that open and close the water path.
- Disconnect the electrical connectors from the solenoids.
- Using a multimeter set to ohms (Ω), touch the probes to the two terminals of each solenoid.
- A healthy solenoid should show a resistance reading, usually between 200 and 500 ohms. No reading (open circuit) or an extremely low reading (short circuit) indicates a faulty solenoid.
- Test for Voltage (Advanced): If your solenoids show good continuity but still no water, the problem might be with the electrical supply to the valve. This requires caution as you'll be testing with power on.
- Reconnect the electrical connectors to the solenoids.
- Carefully plug the fridge back in and turn on the water supply.
- With your multimeter set to AC voltage, place the probes on the electrical terminals of the solenoid while someone activates the water dispenser or the ice maker cycle.
- You should read approximately 120V AC (or 240V AC for some older or commercial units) when the dispenser is activated or the ice maker is calling for water. No voltage suggests a control board or wiring issue, not the valve itself.
For a visual demonstration of locating and testing the water inlet valve, check out this helpful video from AppliancePartsPros.com! It provides excellent guidance on diagnosing the issue.
How to Replace a Refrigerator Water Inlet Valve
If your testing confirms the water inlet valve is faulty, replacement is the next step. Gather your tools: a new replacement valve (ensure it's the correct model for your fridge!), screwdrivers, nut drivers or wrenches, a bucket, and towels.
- Safety First (Again!): Unplug the refrigerator and turn off the main water supply to the fridge.
- Drain Residual Water: Place a towel or small bucket under the valve area to catch any water that may leak out when disconnecting lines.
- Disconnect Water Lines:
- Plastic Tubing: For plastic lines, you'll typically push in on a collar around the tubing and pull the tubing out.
- Copper/Braided Lines: For compression fittings, use a wrench to loosen the nut.
- Be prepared for some water to escape.
- Disconnect Electrical Connections: Carefully pull off the wire harnesses connected to the valve solenoids. Pay attention to how they are oriented, or take a picture.
- Remove the Old Valve: Unscrew any mounting screws or clips holding the valve in place and remove it.
- Install the New Valve:
- Mount the new valve in the same position as the old one, securing it with screws or clips.
- Reconnect the electrical harnesses.
- Reconnect the water lines. Ensure all connections are snug but don't overtighten, especially with plastic fittings.
- Restore Power and Water: Turn the water supply back on slowly and check for any immediate leaks at the connections. Plug the refrigerator back in.
- Test the Dispenser and Ice Maker:
- Dispense a few cups of water to purge any air from the lines and check for proper flow.
- For the ice maker, it may take 12-24 hours to produce its first batch of ice.
Need a visual guide for the replacement steps? The AppliancePartsPros.com video also walks you through the removal and installation process, which can be incredibly helpful.
Tips for Success
- Order the Correct Part: Always use your refrigerator's model number to find the exact replacement water inlet valve. A slight difference can lead to compatibility issues or leaks.
- Check for Leaks Thoroughly: After installation, don't just glance. Keep an eye on the connections for several hours, or even overnight, to ensure there are no slow drips.
- Bleed Air from the System: After replacing the valve, dispense several glasses of water to clear air from the lines. This prevents sputtering and ensures smooth operation.
- Don't Force Anything: If a connection isn't fitting easily, recheck your steps and the part. Forcing can cause damage.
Conclusion
A malfunctioning refrigerator water inlet valve can be a real nuisance, but with a bit of patience and the right tools, it's a repair most homeowners can tackle. By following these testing and replacement steps, you can restore your fridge's water and ice functions, saving yourself the cost of a service call. If you encounter any difficulties or are unsure about any step, don't hesitate to consult a professional appliance repair technician.
Happy repairing!