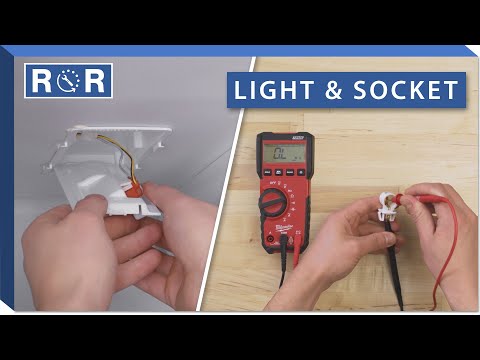
Refrigerator Light & Socket (Testing & Replacement)
Shedding Light on the Problem: Testing & Replacing Your Refrigerator Light Bulb & Socket
Ever open your refrigerator door, expecting a bright, welcoming glow, only to be met with darkness? A non-working fridge light isn't just an annoyance; it can make finding ingredients a hassle and even lead to forgotten, spoiled food. The good news is that for many homeowners, a dark refrigerator is a DIY-fixable problem, often boiling down to a faulty light bulb or socket. This guide will walk you through the steps to diagnose and repair your refrigerator's lighting system, helping you bring illumination back to your perishables!
Why Your Refrigerator Light Matters
Beyond simple convenience, a functioning refrigerator light contributes to food safety and efficiency. It helps you quickly locate items, reducing the time the door stays open and saving energy. It also allows you to easily spot expired or overlooked items, preventing waste. So, let's get that light working again!
Safety First: Always Unplug Your Appliance!
Before you begin any diagnostic or repair work inside your refrigerator, the most critical step is to disconnect its power. Unplug the refrigerator from the wall outlet. If the cord is inaccessible, trip the circuit breaker that supplies power to the refrigerator. This precaution is non-negotiable to prevent electrical shock or damage to your appliance.
Common Culprits: Why Your Fridge Light Isn't Working
When your refrigerator goes dark, there are usually a few prime suspects:
- The Light Bulb: Just like any other bulb, it can burn out.
- The Light Socket: Corrosion, loose wiring, or internal damage can prevent power from reaching the bulb.
- The Door Switch: This small button tells the fridge when the door is open or closed, activating or deactivating the light.
- Wiring Issues: Less common, but frayed or disconnected wires can interrupt the electrical flow.
We'll focus on the bulb and socket first, as they are the most common and easiest to address.
Step-by-Step Guide: Testing Your Refrigerator Light Bulb
This is often the simplest fix. Don't assume the bulb is good just because it doesn't look burnt out. Visual inspection isn't always enough.
- Locate and Remove the Bulb: Most refrigerator bulbs are covered by a plastic shield or lens. You might need to gently pry it off, unclip it, or unscrew a retaining screw. Once exposed, twist the bulb counter-clockwise to remove it.
- Visual Inspection: Look for a broken filament (the tiny wire inside the bulb). If it's visibly broken or the glass is dark/cloudy, the bulb is likely bad.
- Test with a Multimeter (Optional but Recommended): Set your multimeter to the continuity setting (usually indicated by a diode symbol or a beeping sound). Touch one probe to the metal tip of the bulb and the other to the threaded base. If the bulb is good, your multimeter should beep or show a reading indicating continuity. No beep or an "OL" (open line) reading means the bulb is bad.
- Test with a Known Good Bulb: The easiest way to test a bulb is to simply replace it with a new one of the correct wattage and type. If the new bulb lights up, your old one was the problem!
For a visual demonstration of checking the light bulb, refer to the beginning of this helpful video: Refrigerator Light Not Working? - How to Replace Refrigerator Light Socket.
Step-by-Step Guide: Testing Your Refrigerator Light Socket
If your bulb tests good, or a new bulb doesn't light up, the socket is the next suspect.
- Visual Inspection: With the bulb removed, look inside the socket. Check for signs of corrosion, rust, or burn marks. Ensure the small metal tab at the bottom of the socket is making good contact. You can gently bend it up slightly (with power disconnected!) to improve contact.
- Test for Voltage (Advanced, Use Caution!):ONLY perform this step if you are comfortable and experienced with electrical testing. Power must be restored momentarily for this test, so extreme caution is advised. Set your multimeter to measure AC voltage (V~). With the refrigerator plugged back in and the door switch activated (often by holding it in), carefully touch one probe to the bottom contact of the socket and the other to the threaded side. You should read approximately 120V AC. If you get no voltage, the problem lies further up the electrical line (door switch, wiring, or control board).
- Test for Continuity (with Power Disconnected): With the refrigerator unplugged, set your multimeter to continuity. Touch one probe to the bottom contact of the socket and the other to one of the wires connecting to the socket. Then repeat for the other wire. You should get continuity on both connections. This checks for a break within the socket's internal wiring.
The video also demonstrates how to check the light socket for issues around the 0:50 mark: Refrigerator Light Not Working? - How to Replace Refrigerator Light Socket.
Step-by-Step Guide: Replacing Your Refrigerator Light Bulb
Once you've determined the bulb is the issue, replacement is straightforward.
- Purchase the Correct Bulb: This is crucial. Refrigerator bulbs are often smaller, more durable, and designed to withstand cold temperatures. Check your appliance manual or the old bulb itself for wattage and base type (e.g., A15, E12 candelabra base). Using a standard household bulb might lead to premature failure or even damage.
- Install the New Bulb: Screw the new bulb clockwise into the socket until it's snug, but don't overtighten.
- Replace the Cover: Reattach the light shield or cover.
- Restore Power: Plug your refrigerator back in. Open the door, and hopefully, you'll be greeted with light!
Step-by-Step Guide: Replacing Your Refrigerator Light Socket
If you've confirmed the socket is faulty, replacing it is the next step. This is a more involved repair but still manageable for the determined DIYer.
- Disconnect Power: Crucial safety step – unplug the refrigerator.
- Access the Socket: The socket assembly is usually located behind the light cover. You might need to remove screws or clips to fully access it. In some models, the entire light housing may need to be unclipped or unscrewed.
- Disconnect Wiring: Carefully note or take a photo of how the wires are connected to the old socket. There are typically two wires. You'll usually find push-on terminals or screw terminals. Gently pull the terminals off the old socket.
- Remove the Old Socket: The socket might be held in place by clips, screws, or simply by the wiring itself. Remove any fasteners and carefully pull the old socket out.
- Install the New Socket: Connect the wires to the new socket, ensuring they are securely attached. Make sure to match the wiring configuration you noted earlier.
- Mount the New Socket: Secure the new socket in its housing, ensuring it's firmly in place.
- Replace Covers and Panels: Reassemble any covers, shields, or panels you removed.
- Restore Power and Test: Plug the refrigerator back in and test the light.
The video provides an excellent visual guide for replacing the light socket, starting around the 1:30 mark: Refrigerator Light Not Working? - How to Replace Refrigerator Light Socket.
What If It's Still Dark?
If you've tested and replaced the bulb and socket, and your fridge is still in the dark, the issue likely lies with the door switch or the main control board/wiring. Testing the door switch typically involves checking for continuity when the button is released (door open) and no continuity when it's pressed (door closed). If these components are faulty or if you're uncomfortable proceeding with further electrical diagnostics, it's best to call a qualified appliance repair technician.
Illuminate Your Fridge Today!
A non-working refrigerator light is a minor inconvenience that can quickly become a major frustration. By following these steps, you can effectively diagnose whether the problem is your light bulb or socket and replace it yourself. Appliance parts for most major brands are readily available, making this a common and satisfying DIY repair. Get your fridge glowing again and make rummaging for snacks a thing of the past!