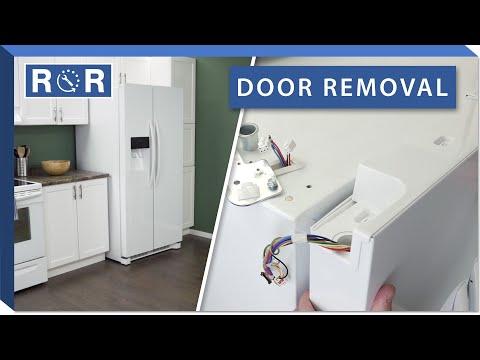
Refrigerator Door Removal
Navigating Tight Spaces: Your Guide to Refrigerator Door Removal
Moving, renovating, or simply performing a tricky repair? Sometimes, the biggest obstacle isn't the appliance itself, but getting it where it needs to go. That’s often the case with refrigerators, especially when faced with narrow doorways or hallways. Don't risk damaging your fridge or your home by trying to force it! Removing your refrigerator doors can provide that crucial extra inch or two, making the impossible possible. This guide will walk you through the process, ensuring a smooth and safe experience.
Why You Might Need to Remove Your Refrigerator Door
There are several common scenarios where temporary refrigerator door removal becomes a necessity:
- Moving to a New Home: One of the most frequent reasons. Getting a large fridge through tight apartment doors or older home entrances is often impossible with the doors attached.
- Renovating Your Kitchen: Installing new flooring, cabinets, or even just painting can require moving the fridge, and door removal helps protect both the appliance and your new finishes.
- Appliance Repair: Some advanced repairs, especially those involving the internal wiring or cooling system behind the door panel, might necessitate temporary door removal for better access.
- Door Replacement: If a door is damaged beyond repair, removing the old one is the first step to installing a new one.
Safety First: Essential Preparations
Before you grab your tools, prioritize safety. This isn't just about protecting yourself, but also your valuable appliance.
- Unplug the Refrigerator: ALWAYS disconnect the power cord from the wall outlet. This prevents accidental shocks or the compressor kicking on while you're working.
- Empty the Refrigerator and Freezer: Remove all food items, shelves, drawers, and any other loose components from both the fridge and freezer compartments. This makes the doors lighter and prevents items from falling out.
- Disconnect Water Line (if applicable): If your refrigerator has an ice maker or water dispenser, you'll need to shut off the water supply to the fridge and disconnect the water line at the back of the unit. Have a towel ready for any residual drips.
- Gather Your Tools: Having everything on hand saves time and frustration.
- Enlist a Helper: Refrigerator doors are heavy and awkward. Do not attempt this alone. A second person is essential for safely lifting and supporting the doors.
- Protect Your Floors: Lay down blankets or cardboard on the floor where you'll be working and resting the doors to prevent scratches.
Tools You'll Need
While specific tools can vary slightly by model, here’s a general list of what you’ll likely need:
- Nut drivers (often 1/4", 5/16", 3/8") or a socket wrench set
- Phillips head screwdriver
- Flathead screwdriver (for prying plastic covers)
- Adjustable wrench (for water line connections)
- Pliers
- Painter's tape or masking tape (for labeling wires/hoses)
- A small container for screws and parts
- Towels or rags
- Blankets or cardboard (for protecting floors and doors)
Step-by-Step Guide: How to Remove a Refrigerator Door
While models vary, the general process for removing a refrigerator door follows these steps. We'll focus on a common top-freezer or bottom-freezer configuration, but side-by-side and French door models will have similar steps for each door.
1. Disconnect Power and Empty Contents
As mentioned in the safety section, unplug the fridge and remove all food, shelves, and drawers. If your fridge has a water dispenser or ice maker, shut off the water supply and disconnect the water line from the back of the unit.
2. Access the Top Hinge
Most refrigerator doors are secured by hinges at the top and bottom. Start with the top hinge. You may need to:
- Remove a plastic hinge cover. These often pop off or are held by a single screw.
- Carefully disconnect any electrical wires or water lines that run into the door (for ice/water dispensers). These usually have quick-disconnect fittings. Label them with painter's tape to remember their orientation for reinstallation.
3. Remove the Top Hinge Screws
Using your nut driver or socket wrench, carefully unscrew the bolts or screws holding the top hinge plate to the refrigerator cabinet. Have your helper ready to support the door as soon as the hinge is loose.
4. Lift the Door Off
Once the top hinge is removed, the door is often still resting on a pin from the bottom hinge. With your helper, gently lift the door straight up off the bottom hinge pin. Be prepared for its weight! Once free, immediately move it to a safe, protected area, laying it flat on a blanket or cardboard.
5. Repeat for Additional Doors (if applicable)
If you have a bottom freezer door, a side-by-side, or a French door refrigerator, repeat steps 2-4 for each additional door. Remember that French doors and side-by-side models often have additional wiring for their ice/water systems running through the middle hinge or integrated into the door itself, requiring extra care when disconnecting. For a visual demonstration of these steps, including handling water lines and different hinge types, check out this helpful video: How to Remove Refrigerator Doors.
6. Remove the Bottom Hinge (Optional)
In some cases, especially if you need to remove the main refrigerator body, you might also need to remove the bottom hinge from the cabinet. This usually involves unscrewing a few bolts from the bottom bracket.
Reinstallation Tips
Reinstalling the doors is essentially the reverse process:
- With your helper, carefully align the door’s bottom hinge receiver with the bottom hinge pin on the refrigerator cabinet.
- Lower the door onto the pin.
- Reattach the top hinge, making sure to align all screw holes. Tighten the screws securely.
- Reconnect any electrical wires or water lines, referencing your labels.
- Replace any plastic hinge covers.
- Reconnect the main water supply (if applicable) and plug the refrigerator back in.
- Test the doors for proper alignment and ensure they seal correctly. You might need to make minor adjustments to the hinges to get a perfect seal.
Troubleshooting Common Issues
- Stuck Hinge Screws: Apply a penetrating lubricant and let it sit for a few minutes before trying again.
- Door Not Sealing Properly: This often means the hinges aren't perfectly aligned. Loosen the hinge screws slightly, adjust the door, and retighten. Some hinges have adjustment screws for fine-tuning.
- Damaged Wires/Hoses: If you accidentally damage a wire or water hose during removal or reinstallation, do NOT plug the fridge back in. Contact a professional immediately to avoid electrical hazards or water leaks.
When to Call a Professional
While removing refrigerator doors is a manageable DIY project for many, there are times when calling a professional is the smartest choice:
- Complex Models: French door or side-by-side refrigerators with integrated ice/water systems in both doors can have intricate wiring and plumbing that are best handled by an expert.
- Uncertainty: If you're unsure about any step, or if your refrigerator model seems particularly complex, don't risk damaging your appliance or injuring yourself.
- Warranty Concerns: Some manufacturers might specify that certain repairs or alterations void the warranty if not performed by authorized personnel.
Your local appliance repair technicians are equipped with the knowledge and tools to safely remove and reinstall refrigerator doors, especially on high-end or complex models.
Conclusion
Removing refrigerator doors doesn't have to be a daunting task. With careful preparation, the right tools, and a helping hand, you can successfully navigate tight spaces or prepare for essential repairs. Remember to always prioritize safety and don't hesitate to seek professional assistance if the job feels beyond your comfort level. For all your appliance parts needs or to schedule a service appointment, visit our website or give us a call today!