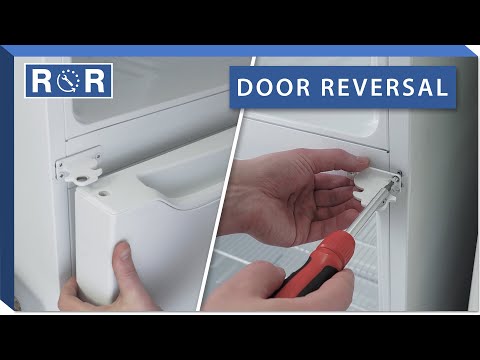
How to Reverse a Refrigerator Door
Unlock Your Kitchen's Potential: How to Reverse Your Refrigerator Door Swing
Ever wished your refrigerator door opened from the other side? Maybe you’ve rearranged your kitchen, moved into a new home, or simply want to optimize the flow of your cooking space. A refrigerator door that opens in the "wrong" direction can be surprisingly inconvenient, blocking pathways or making it awkward to access your food. The good news is that for many models, reversing the door swing is a straightforward DIY project that can dramatically improve your kitchen's functionality!
At [Your Company Name], we believe in empowering homeowners with the knowledge to tackle common appliance issues. Reversing a fridge door is a perfect example of a repair that can save you money and customize your appliance to your lifestyle. Let's dive in!
First Things First: Is Your Refrigerator Door Reversible?
Before you grab your tools, you need to confirm that your specific refrigerator model is designed for door reversal. Not all refrigerators offer this flexibility. Here's how to check:
- Consult Your Owner's Manual: This is always your best first resource. Most manuals will clearly state if the door is reversible and provide specific instructions.
- Inspect the Opposite Side: Look closely at the side of your refrigerator opposite the current hinges. Do you see pre-drilled holes for hinge plates, handles, and stopper pins, usually covered by plastic plugs? If so, your fridge is likely reversible.
If you don't have a manual, you can often find a digital version on the manufacturer's website by searching for your refrigerator's model number (usually found on a sticker inside the fridge compartment).
Gather Your Tools and Supplies
Having the right tools on hand will make this job much smoother. Here's a list of what you'll typically need:
- Screwdrivers: Phillips head and flathead, possibly Torx bits depending on your model.
- Socket Wrench Set: For some hinge bolts.
- Putty Knife or Flat-Blade Tool: To gently pry off hinge covers and plugs.
- Masking Tape: To secure the door(s) during hinge removal.
- A Helper: Highly recommended for safely handling heavy doors.
- Owner's Manual: As mentioned, for specific instructions.
- Soft Blanket or Cardboard: To protect the door when it's removed.
Safety First: Prepare for the Reversal
Before you begin any work, prioritize safety:
- Unplug the Refrigerator: Always disconnect power to avoid electrical hazards.
- Empty the Doors: Remove all food, shelves, and bins from the refrigerator and freezer doors to reduce weight and prevent spills.
- Tape the Doors Shut: Use masking tape to secure both the refrigerator and freezer doors (if applicable) to the main unit. This prevents them from swinging open unexpectedly when you remove hinges.
Step-by-Step Guide to Reversing Your Refrigerator Door
While specific steps can vary slightly by model, the general process remains consistent. For a comprehensive visual walkthrough, we highly recommend checking out this helpful video: How To Reverse A Refrigerator Door.
Step 1: Remove the Top Hinge
Start with the top hinge. Have your helper support the door firmly. Use your screwdriver or socket wrench to carefully remove the bolts securing the top hinge to the refrigerator frame. Once the hinge is free, lift it off and set it aside.
Step 2: Remove the Doors
With the top hinge removed, you can now carefully lift the door(s) off the middle and/or bottom hinge pins. If you have a freezer-on-top or freezer-on-bottom model, you'll typically remove the upper door first, then the lower door. Place the doors face-up on a soft blanket or cardboard to prevent scratches.
Step 3: Relocate the Middle Hinge (If Applicable)
Many refrigerators, especially those with a freezer compartment, have a middle hinge that connects the two doors or secures the freezer door to the frame. Remove this hinge and its components. You'll need to move the hinge bracket, pin, and any associated hardware to the corresponding holes on the opposite side of the refrigerator frame.
Step 4: Relocate the Bottom Hinge
The bottom hinge is crucial for supporting the entire door's weight. Remove the bottom hinge assembly from its current position. This often involves unscrewing a bracket from the bottom of the fridge and possibly moving a hinge pin within the bracket. Reattach the entire assembly to the designated holes on the opposite side of the refrigerator's base.
Step 5: Transfer Door Components
Now, you'll need to transfer several parts from one side of the door to the other:
- Hinge Pins/Bushings: Remove the hinge pins or plastic bushings from the top and bottom of the door(s) and insert them into the corresponding holes on the opposite side.
- Handles: Unscrew the door handles from their current side and securely reattach them to the opposite side. Don't forget any decorative plugs or caps that cover the screw holes.
- Door Stops/Closers: Some doors have small plastic or metal door stops or cam closers at the bottom that help the door seal properly. These often need to be unscrewed and moved to the new hinge side.
- Plug Covers: Use your putty knife to remove the plastic plugs covering the screw holes on the new hinge side. Use these plugs to fill the now-empty holes on the old hinge side.
Step 6: Reattach the Doors
This is where your helper comes in handy! Start by carefully placing the bottom door (usually the refrigerator compartment) onto the newly installed bottom hinge pin. Ensure it's seated correctly. Then, attach the middle hinge (if applicable), followed by the top hinge. Only hand-tighten the screws at this stage.
Step 7: Check Alignment and Test
Once all hinges are loosely attached, gently open and close the door(s) several times. Check for proper alignment and ensure the door seals tightly against the gasket all the way around. If the door isn't sealing, or if it sags, adjust the hinge screws as needed. Once satisfied, fully tighten all hinge screws.
Plug your refrigerator back in and listen for the compressor to kick on. Give it some time to cool down before reloading your food.
Troubleshooting Tips
- Door Not Sealing: Check for proper hinge alignment. The door gasket might also be twisted; gently push it back into place.
- Door Sags: Ensure all hinge screws are fully tightened. Sometimes, the hinge pin might not be seated correctly.
- Missing Screws/Parts: If you lose a screw or discover a worn-out hinge component during the process, [Your Company Name] has a wide selection of genuine appliance parts. Check our online catalog or contact us for assistance!
When to Call a Professional
While reversing a refrigerator door is a common DIY task, there are times when it's best to call in the experts. If you encounter significant difficulties, if your refrigerator is still under warranty, or if you're simply uncomfortable with the process, don't hesitate to reach out to a qualified appliance repair technician. Our team at [Your Company Name] is always here to help!
Successfully reversing your refrigerator door can make a big difference in your kitchen's usability. Enjoy your newly optimized space!