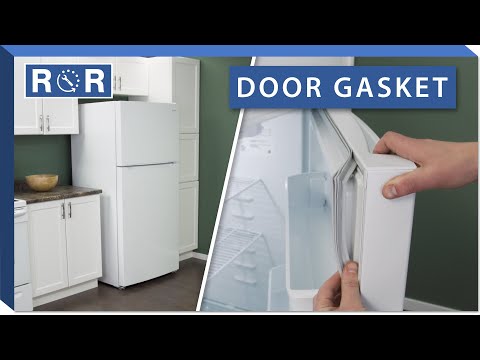
Refrigerator Door Gasket
The Unsung Hero of Your Kitchen: Understanding Your Refrigerator Door Gasket
Ever wonder what keeps your food fresh and your energy bills in check? Often, it's the humble, yet incredibly important, refrigerator door gasket. This seemingly simple rubber seal plays a critical role in your appliance's efficiency and your family's health. Let's dive into the world of refrigerator gaskets and why they matter so much.
What Exactly is a Refrigerator Door Gasket?
The refrigerator door gasket, also known as a door seal, is the flexible rubber or vinyl strip that runs along the perimeter of your refrigerator and freezer doors. Its primary job is to create an airtight seal when the door is closed, preventing warm ambient air from entering and cold air from escaping.
Why Your Gasket is Crucial for Food Freshness and Efficiency
A properly functioning gasket is vital for several reasons:
- Energy Efficiency: It prevents your refrigerator's compressor from overworking to maintain temperature, saving you money on electricity bills.
- Food Preservation: An airtight seal keeps internal temperatures consistent, extending the shelf life of your groceries and reducing food spoilage.
- Moisture Control: It keeps humidity out, preventing excessive frost buildup in freezers and condensation inside the fridge.
Spotting the Signs of a Worn-Out Gasket
How do you know if your gasket is failing? Look out for these common indicators:
- Higher Energy Bills: If your electricity usage suddenly spikes without explanation, your fridge might be working overtime due to a poor seal.
- Food Spoiling Quickly: Groceries going bad faster than usual is a major red flag that temperatures aren't consistent.
- Condensation or Frost Buildup: Moisture inside your fridge or excessive frost in the freezer suggests warm air is seeping in.
- Sweating or Icing on the Door: Visible moisture or ice forming on the exterior or interior edges of the door.
- The Door Doesn't Close Tightly: If the door swings open easily or doesn't feel securely closed.
The Simple Paper Test: Is Your Gasket Leaking?
Before you jump to conclusions, perform a simple test to check your gasket's integrity. Open your refrigerator door, place a dollar bill or a piece of paper between the door and the fridge frame, and then close the door. Try to pull the paper out. If it slides out easily, the seal is weak at that spot. Repeat this test around the entire perimeter of both doors. This easy test is also demonstrated clearly in this helpful video on refrigerator gasket replacement: How to Replace a Refrigerator Door Gasket.
Can You Fix a Damaged Gasket? Cleaning and Minor Repairs
Sometimes, a gasket isn't truly 'broken,' just dirty or stiff:
- Cleaning: Over time, food crumbs and spills can accumulate on the gasket, preventing a proper seal. Clean it thoroughly with warm, soapy water and a soft cloth.
- Reshaping/Softening: If the gasket has become stiff or slightly warped, you might be able to soften it temporarily. Gently warm the affected area with a hairdryer on a low setting (be careful not to melt the rubber!) and then try to reshape it. Some suggest applying a thin layer of petroleum jelly to keep it pliable.
When Replacement is Your Best Option
While cleaning and minor adjustments can sometimes offer a temporary fix, a visibly torn, cracked, or severely hardened gasket usually requires replacement. A failed gasket will continue to cost you money in energy bills and potentially lead to food spoilage and even compressor failure if your fridge works too hard for too long.
DIY Refrigerator Gasket Replacement: A General Guide
Replacing a refrigerator door gasket is a common DIY appliance repair project that many homeowners can tackle. While specific steps vary by model, here's a general overview:
- Unplug the Refrigerator: Always disconnect power for safety.
- Empty the Door Shelves: Remove items to make the door lighter and easier to work with.
- Identify Gasket Type: Gaskets are typically either 'snap-in' (held by a channel) or 'screw-in' (secured by screws under the gasket flap).
- Remove the Old Gasket: Carefully pry out snap-in gaskets or unscrew screw-in gaskets.
- Clean the Channel: Thoroughly clean the area where the new gasket will sit.
- Install the New Gasket: Work your way around, ensuring it's seated properly. For snap-in types, press firmly. For screw-in, re-secure screws.
- Allow to Settle: Close the door and let the new gasket settle for a few hours, or even overnight, before testing.
For a visual, step-by-step demonstration of a snap-in gasket replacement, check out this excellent guide: Refrigerator Door Gasket Replacement Video Guide. Remember to always consult your appliance's owner's manual or a specific repair guide for your model.
Finding the Perfect Fit: Choosing Your Replacement Gasket
The most critical step in gasket replacement is ordering the correct part. Always locate your refrigerator's model number (usually inside the fridge compartment, behind a kick plate, or on the back of the unit) and use it to find an exact OEM (Original Equipment Manufacturer) or a high-quality aftermarket replacement gasket. An ill-fitting gasket won't seal properly, rendering your repair useless.
Keep Your Cool: A Well-Maintained Gasket Saves the Day
Your refrigerator door gasket might be out of sight, but it should never be out of mind. Regular cleaning and timely replacement can prevent food spoilage, reduce energy consumption, and extend the life of your appliance. If you notice any signs of wear, don't delay – a small fix now can save you a lot of trouble and money down the road. Keep that fridge sealed tight, and your food (and wallet) will thank you!