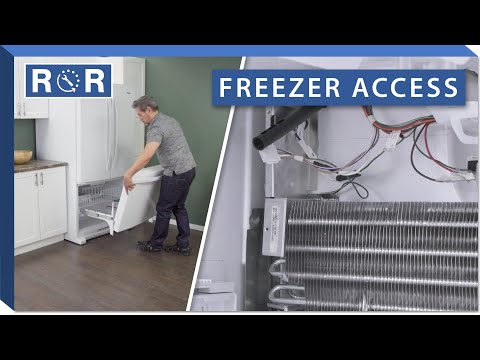
Bottom Freezer Door Removal & Freezer Access
Unlock Your Freezer's Potential: A Guide to Bottom Freezer Door Removal and Access
Whether you're moving a behemoth refrigerator through a tight doorway, tackling a DIY repair, or simply need to deep clean every nook and cranny, sometimes the freezer door just has to go. While it might seem daunting, removing your bottom freezer door is a manageable task for most homeowners with the right guidance and tools. This guide will walk you through the process, helping you gain crucial access for various needs.
Why Would You Need to Remove Your Bottom Freezer Door?
There are several practical reasons why you might need to temporarily detach your freezer door:
- Moving Appliances: The most common reason! A removed door can shave off precious inches, allowing your refrigerator to fit through narrow hallways, doorways, or stairwells without damaging the appliance or your home.
- Appliance Repair: Many internal freezer components, such as the evaporator fan, defrost heater, or certain ice maker mechanisms, are located behind panels that are easier to access with the door completely out of the way.
- Deep Cleaning: For a truly thorough cleaning, removing the door allows you to clean hinges, seals, and the interior more effectively.
- Replacing a Damaged Door: If your freezer door is dented or broken, you'll need to remove the old one to install a new replacement.
Safety First: Essential Preparations
Before you grab any tools, safety is paramount. Follow these steps to ensure a smooth and safe process:
- Unplug the Refrigerator: Always disconnect the power supply from the wall outlet. This prevents accidental shocks and protects the appliance.
- Empty the Freezer: Remove all food items, ice, and freezer bins. Store perishable items in a cooler with ice packs to prevent spoilage.
- Clear the Area: Ensure you have plenty of space to work around the refrigerator, especially directly in front of the freezer compartment.
- Gather Your Tools: Having everything at hand will make the job quicker and less frustrating.
Tools You'll Need
Most bottom freezer door removals require a basic set of household tools:
- Phillips head screwdriver
- Flathead screwdriver (sometimes useful for prying covers)
- Nut driver set (if your hinges use hex head screws)
- Adjustable wrench (for some hinge types)
- Putty knife or thin flat tool (for prying off covers)
- Soft blanket or towel (to protect the door once removed)
- A helper (optional, but highly recommended for lifting and maneuvering)
Step-by-Step Guide: Removing Your Bottom Freezer Door
While models vary, the general steps for removing a bottom freezer door are quite similar across brands. For a helpful visual guide, consider watching this video on bottom freezer door removal, which demonstrates the process on a Samsung model.
1. Empty and Access
Once your freezer is unplugged and empty, remove all internal drawers and baskets. This will give you clear access to the bottom of the door and the freezer compartment.
2. Locate Hinges and Wiring
Examine the bottom of the freezer door. You'll typically find a hinge assembly. Some models also have a decorative cover over the hinge that needs to be removed first. Look for electrical wiring that runs from the main refrigerator body into the freezer door, especially if your door has an ice maker, dispenser controls, or internal lighting. This wiring will need to be disconnected.
3. Disconnect Electrical Connections (If Applicable)
If there's a wire harness running into the door (often visible near the bottom hinge), carefully disconnect it. There's usually a plastic clip or connector that you'll need to press or slide to release. Take care not to pull on the wires themselves. The video referenced above clearly shows this step, which is crucial for modern refrigerators with in-door features.
4. Remove Hinge Screws
Using the appropriate screwdriver or nut driver, carefully remove the screws that secure the bottom hinge to the refrigerator frame. Keep these screws in a safe place, as you'll need them for reinstallation.
5. Carefully Lift and Remove the Door
Once the bottom hinge is detached and any wiring is disconnected, the freezer door is usually held in place by a pin at the top. With a firm grip (and ideally a helper), gently lift the door straight up until it clears the top hinge pin. Once free, carefully set the door down on a soft blanket or towel to protect its finish. If your door is particularly heavy, use proper lifting techniques or get assistance.
Accessing the Freezer Interior for Repair
With the door removed, you now have much easier access to the internal components of your freezer. This is particularly useful for:
- Evaporator Fan Replacement: Often located behind a rear panel inside the freezer, the fan circulates cold air.
- Defrost Heater or Thermistor Replacement: These components are usually found near the evaporator coils, behind the same rear panel.
- Ice Maker Repair: While some ice makers are in the door, many are in the main freezer compartment, and door removal provides unhindered access.
Always consult your appliance's service manual or a specific repair guide for detailed instructions on accessing and replacing individual components. Remember to take photos as you disassemble to aid in reassembly.
Reinstallation Tips
Putting the door back on is essentially the reverse of removal:
- Align the Top Hinge: Carefully align the door with the top hinge pin and lower it into place.
- Secure the Bottom Hinge: Reattach the bottom hinge assembly, ensuring all screws are tightened securely.
- Reconnect Electricals: Reconnect any wire harnesses, making sure they click into place firmly.
- Replace Covers: Reattach any decorative hinge covers or trim pieces.
- Test the Door: Open and close the door a few times to ensure it swings freely and seals properly. Check the gasket for any twists or damage.
- Plug It In: Once everything is secure, plug the refrigerator back into the power outlet.
- Return Food: Allow the freezer to cool down sufficiently before returning food items.
When to Call a Professional
While removing a freezer door is a common DIY task, some situations warrant professional help. If you encounter complex wiring you're unsure about, suspect a sealed system issue (refrigerant leaks), or simply feel uncomfortable with any step of the process, don't hesitate to call a qualified appliance repair technician. Attempting repairs beyond your skill level can lead to further damage or personal injury.
By following these steps, you can confidently remove your bottom freezer door, whether for moving, cleaning, or getting to the heart of a repair. Remember to work safely and methodically, and you'll have your freezer back in top shape in no time!