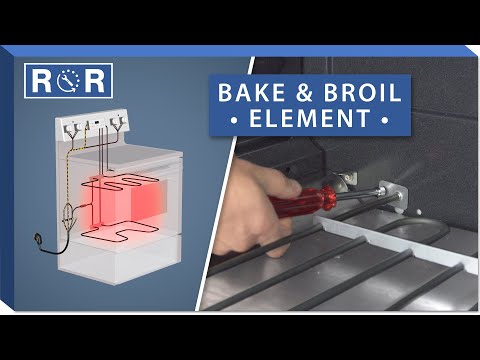
Oven Heating Element - Testing & Replacement
Is your oven taking forever to preheat, or worse, not heating at all? Before you resign yourself to a future of takeout, there's a good chance the culprit is a faulty heating element. The good news? Testing and replacing an oven heating element is a common DIY repair that can save you time and money. As experts in appliance parts and repair, we're here to guide you through the process.
Why Your Oven Isn't Heating (And Why the Element is Often to Blame)
Electric ovens rely on heating elements to generate the heat needed for cooking. There are typically two main elements: the bake element (at the bottom of the oven) and the broil element (at the top). If one of these fails, your oven won't reach the desired temperature, or it might not heat at all. Other issues like a faulty thermostat or control board can also cause heating problems, but a broken heating element is often the easiest and most common fix.
Safety First: Always Disconnect Power!
Before you touch anything inside your oven, the absolute most critical step is to disconnect its power supply. You can do this by:
- Unplugging the oven from the wall outlet.
- Flipping the circuit breaker for your kitchen or oven off at your home's main electrical panel.
Never work on an appliance with live electricity. Your safety is paramount!
Identifying Your Oven's Heating Elements
Most electric ovens have two visible heating elements:
- Bake Element: Located at the bottom of the oven cavity, often partially hidden or exposed. This is the primary element for baking.
- Broil Element: Located at the top of the oven cavity. This element is used for broiling and can also assist in preheating.
Some ovens, especially newer models, might have a hidden bake element beneath the oven floor. If yours is hidden, the replacement process might be slightly different, but the testing principles remain the same.
Testing the Heating Element: Visual Inspection
Often, a faulty heating element will show obvious signs of damage. Before grabbing your tools, give the element a good visual inspection:
- Look for Breaks or Cracks: A heating element is essentially a coil inside a metal tube. If the coil breaks, the tube will often crack or sag.
- Check for Blisters or Burn Marks: These are strong indicators that the element has overheated and failed. You might see discolored spots or even a small hole.
If you see any of these signs, you've likely found your problem, and the element needs replacement.
Testing the Heating Element: The Multimeter Method
If there's no visible damage, you'll need a multimeter to test the element's continuity (whether electricity can flow through it). This is a definitive way to determine if the element is faulty.
- Prepare the Oven: Ensure the power is OFF and the oven is cool. Remove any oven racks that might be in the way.
- Access the Element: You might need to remove a few screws holding the element in place to slightly pull it forward for easier access to the terminals.
- Set Your Multimeter: Turn your multimeter to the "Ohms" (Ω) setting, typically the lowest range (e.g., 200 ohms).
- Test Continuity: Place one probe of the multimeter on each terminal of the heating element.
- Read the Results:
- Good Element: A working heating element will show a resistance reading, usually between 10 and 50 ohms. The specific reading can vary by model, but any stable number in this range indicates continuity.
- Bad Element: If the element is broken, your multimeter will display "OL" (Over Limit) or "1" (indicating an open circuit/infinite resistance). This means electricity cannot flow through it, and the element is faulty.
For a clear visual demonstration of how to use a multimeter to test an oven element, check out this helpful video: https://www.youtube.com/watch?v=ABope7vl5IY (around the 0:50 mark).
Replacing the Oven Heating Element
Once you've confirmed a faulty element, replacing it is straightforward.
Tools You'll Need:
- New heating element (ensure it's the correct part for your oven model!)
- Screwdriver (Phillips or flathead, depending on your oven)
- Needle-nose pliers (optional, for gripping wires)
- Work gloves (optional)
Step-by-Step Replacement:
- Disconnect Power (Again!): Double-check that the oven is unplugged or the circuit breaker is off.
- Remove Oven Racks: Clear the oven interior.
- Locate and Remove Old Element: The element is usually held in place by two screws at the back of the oven cavity. Unscrew these.
- Gently Pull Element Forward: Carefully pull the element a few inches out of the oven. This will expose the electrical terminals and wires connected to it.
- Disconnect Wires: Using pliers or your fingers, carefully pull the wire connectors straight off the terminals of the old element. Be careful not to let the wires retract into the back wall of the oven. If they look loose, you can clip them to something or use a piece of tape to secure them.
- Connect New Element: Attach the wire connectors firmly to the terminals of the new heating element. Ensure they are snug.
- Install New Element: Slide the new element back into place, aligning the screw holes. Re-insert and tighten the screws.
- Restore Power & Test: Plug the oven back in or flip the circuit breaker on. Turn on your oven to a baking temperature and observe if it heats up correctly. You should see the element glow red.
This video provides an excellent visual guide for the removal and installation process: https://www.youtube.com/watch?v=ABope7vl5IY (starting around 1:30).
When to Call a Professional
While testing and replacing an oven heating element is a common DIY repair, there are times when it's best to call a professional:
- If you're uncomfortable working with electricity.
- If your oven is a gas model (gas appliance repair should always be left to certified professionals).
- If replacing the element doesn't solve the problem, indicating a deeper electrical issue like a faulty thermostat, control board, or wiring.
Get Your Oven Back in Action!
A non-heating oven can be a major inconvenience, but with a little troubleshooting and the right part, you can often get it working perfectly again. Testing and replacing the heating element is a rewarding DIY repair that saves money and extends the life of your appliance. Browse our extensive selection of genuine oven heating elements and other appliance parts today!