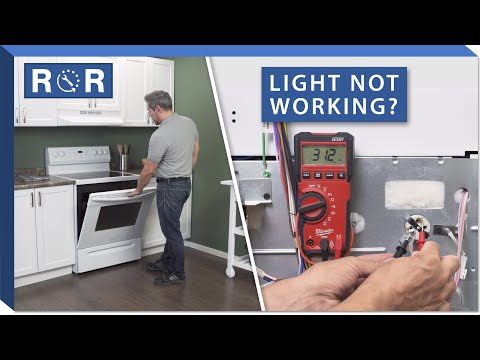
Oven Light Not Working - Troubleshooting
Oven Light Not Working? Troubleshoot & Fix It Like a Pro!
There's nothing quite as frustrating as peering into your oven to check on a delicious roast or a rising cake, only to be met with darkness. A non-functional oven light isn't just an inconvenience; it can make it harder to monitor your cooking, potentially leading to undercooked or overcooked dishes. But before you panic or call for a professional, many oven light issues are surprisingly simple to troubleshoot and fix yourself. As your trusted appliance parts and repair experts, we're here to guide you through the process.
Why a Working Oven Light Matters
Beyond the obvious benefit of seeing your food, a working oven light contributes to a smoother, more enjoyable cooking experience. It helps you:
- Monitor Progress: Check on food without opening the oven door, which can cause heat loss and affect cooking times.
- Prevent Burning: Spotting a dish that's browning too quickly can save your meal.
- Ensure Safety: A well-lit interior helps you safely place and remove hot dishes.
Safety First: Always Unplug!
Before you begin any troubleshooting or repair work on your oven, your absolute first step must always be to disconnect it from its power source. This means unplugging the oven from the wall outlet or, if it's hard-wired, turning off the circuit breaker that supplies power to the appliance. Ignoring this crucial safety step can lead to electrical shock or injury.
Step 1: The Obvious Culprit – The Light Bulb Itself
More often than not, a non-working oven light is due to a burnt-out bulb. Oven bulbs are specially designed to withstand high temperatures, but they don't last forever. Here’s how to check and replace it:
- Access the Bulb: Locate the oven light bulb, usually found on the back wall or side of the oven cavity. It's often covered by a protective glass lens, which you'll need to unscrew or unclip.
- Inspect the Bulb: Carefully remove the old bulb. Look for a broken filament or darkened glass, which are clear signs it's burnt out.
- Check for Looseness: Sometimes, the bulb isn't burnt out, but simply loose. Try gently tightening it. If it works, great! If not, proceed to replacement.
- Replace with the Correct Bulb: It's crucial to use a new bulb specifically designed for oven use. Regular household bulbs cannot withstand the high temperatures inside an oven and can shatter. Check your oven's manual for the correct wattage and type.
For a visual guide on how to safely replace your oven light bulb, check out this helpful video: Oven Light Not Working - Troubleshooting & Repair. It walks you through the process, including accessing the bulb and replacing it with an OEM part.
Step 2: Inspecting the Bulb Socket
If a new bulb doesn't solve the problem, the issue might lie in the bulb socket itself. With the power still off:
- Examine for Corrosion: Look for any signs of rust or corrosion inside the socket, which can prevent a good electrical connection. You can try gently cleaning it with a non-abrasive brush or sandpaper (ensure no residue is left behind).
- Check for Damage: Inspect the metal tabs inside the socket. They should make firm contact with the bulb's base. If they appear bent or damaged, you might be able to carefully bend them back into place with a small, insulated tool.
- Loose Wiring: While less common for the average DIYer to tackle, sometimes wires can come loose from the socket. If you see this, and feel comfortable, you might be able to re-secure them. If not, this is a good point to consider professional help.
Step 3: Checking the Oven Light Switch (If Applicable)
Some ovens, especially older models, have a dedicated light switch on the control panel or door frame. If your oven has one, ensure it's in the "on" position. If it's a push-button switch, try pressing it a few times to see if it's sticking or faulty. A faulty switch might need to be replaced.
Step 4: Examining the Wiring
If the bulb and socket seem fine, the problem could be with the electrical wiring leading to the light. This step requires a bit more caution and electrical knowledge:
- Internal Wiring: With the oven unplugged, you might need to access the back or top panel of your oven to inspect the wiring. Look for any loose, frayed, or burnt wires connected to the light assembly.
- Door Switch: Many ovens have a door switch that turns the light on when the door is opened. If this switch is faulty, the light won't come on. You can often test these with a multimeter if you're comfortable with electrical testing.
If you find damaged wiring or a faulty door switch, these parts can often be replaced. However, if you're uncomfortable working with electrical components, it's best to call a qualified appliance technician.
Step 5: When It Might Be a Control Board Issue
In rare cases, especially with modern ovens, the light problem could stem from a faulty main control board. If the control board isn't sending power to the light circuit, the bulb won't illuminate. This is typically a more complex and expensive repair, best left to a professional technician. A control board issue is usually suspected only after all other, simpler troubleshooting steps have failed.
Need a New Part? We've Got You Covered!
Whether you need a new oven light bulb, a replacement light socket, or a door switch, we stock a wide range of genuine OEM and high-quality aftermarket parts for all major oven brands. Finding the right part is crucial for a lasting repair.
Still Stuck? Time to Call the Experts
If you've gone through these troubleshooting steps and your oven light still isn't working, or if you're simply not comfortable performing electrical repairs yourself, don't hesitate to call in the professionals. Our certified technicians can quickly diagnose the problem and perform a safe, effective repair, getting your oven back to full functionality.
A dark oven doesn't have to ruin your cooking. With a little troubleshooting, you can often shed light on the problem yourself. Happy cooking!