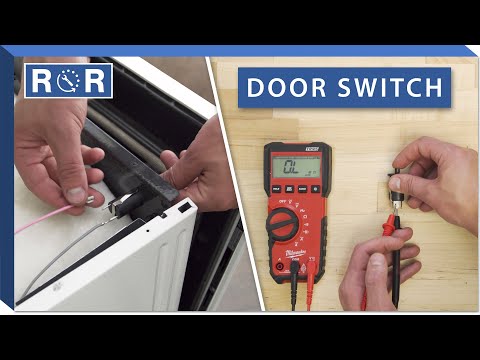
Oven Door Switch - Testing & Replacement
Is Your Oven Acting Up? How to Test & Replace a Faulty Oven Door Switch
Your oven is the heart of your kitchen, baking delicious meals and warming your home. But what happens when it starts acting strangely? Perhaps the oven light stays on, or worse, the oven won't heat up at all. Often, the culprit is a small but mighty component: the oven door switch. This little marvel plays a crucial role in your oven's safety and functionality. In this guide, we'll walk you through how to test and replace your oven door switch, saving you time, money, and a call to a technician.
What Does an Oven Door Switch Do?
The oven door switch is more than just a simple on/off button for your oven light. It's an essential safety interlock and control component. Here’s what it typically manages:
- Oven Light: Most commonly, it controls when the interior oven light turns on and off as the door opens and closes.
- Safety Interlock: It ensures certain functions, like the self-cleaning cycle, only operate when the door is securely latched. It can also prevent the heating elements from activating if the door isn't properly closed, preventing heat loss and potential hazards.
- Cooling Fan: On some models, the switch might also communicate with the cooling fan, ensuring it operates correctly to dissipate heat after cooking.
Symptoms of a Faulty Oven Door Switch
How do you know if your oven door switch is the problem? Look out for these common signs:
- Oven Light Malfunction: The light either stays on constantly (even when the door is closed) or never turns on.
- Oven Not Heating: If the oven thinks the door is open when it's actually closed, it may refuse to heat up to prevent energy waste or potential safety issues.
- Self-Cleaning Cycle Won't Start or Complete: Many ovens require the door switch to confirm the door is securely latched before initiating the high-heat self-cleaning cycle.
- Error Codes: Your oven's display might show a specific error code related to the door or latch mechanism.
- Cooling Fan Issues: If your oven's cooling fan runs constantly or doesn't come on when it should, the door switch could be involved, depending on your model.
Safety First! Before You Begin
Working with any appliance requires caution. Always prioritize your safety:
- Disconnect Power: This is non-negotiable. Unplug the oven from the wall outlet or flip the circuit breaker that supplies power to the oven before touching any internal components.
- Wear Gloves: Appliance interiors can have sharp edges. Work gloves can protect your hands.
- Allow to Cool: If your oven has recently been used, allow it to cool down completely before starting any work.
Tools You'll Need
Gather these items before you start:
- Screwdriver set (Phillips, flathead, possibly Torx)
- Multimeter (for testing continuity)
- Work gloves
- Needle-nose pliers (optional, for electrical connectors)
- Camera or smartphone (to photograph wire connections)
- Replacement oven door switch (once diagnosed)
How to Test Your Oven Door Switch
Testing the switch with a multimeter is the most reliable way to confirm if it's working correctly. The goal is to check for "continuity" – whether electricity can flow through the switch when it's supposed to.
Step 1: Access the Oven Door Switch
The location of your oven door switch can vary widely by brand and model. It's often found:
- Near the door hinges, sometimes requiring removal of the outer door panel.
- Behind the control panel.
- Inside the oven cavity, sometimes mounted to the frame or a bracket near the door latch.
Consult your oven's owner's manual or look up a parts diagram for your specific model number. You may need to remove screws from the control panel, the top panel, or even partially disassemble the oven door itself.
Step 2: Disconnect Wires
Once you've located the switch, you'll see wires connected to its terminals. Before disconnecting anything, take a picture with your phone! This will be invaluable when reconnecting them later. Carefully pull off the wire connectors. They might be a bit stiff.
Step 3: Test for Continuity with a Multimeter
Set your multimeter to the continuity setting (usually indicated by a speaker icon or ohms Ω symbol). A working switch will show continuity (a beep or a reading close to zero ohms) in one position and no continuity (no beep, "OL" or "1" reading) in the other.
Watch this helpful video for a visual demonstration of continuity testing: Oven Door Switch Testing & Replacement. This video specifically shows how to use a multimeter to check for continuity on an oven door switch.
- For a "Normally Open" (NO) switch: This type of switch is open (no continuity) when the door is open (or the switch button is extended) and closes (shows continuity) when the door is closed (or the switch button is pressed).
- For a "Normally Closed" (NC) switch: This type of switch is closed (shows continuity) when the door is open (or the switch button is extended) and opens (no continuity) when the door is closed (or the switch button is pressed).
Test the switch by pressing and releasing its plunger or button. If it doesn't show the expected change in continuity, it's faulty and needs to be replaced.
How to Replace Your Oven Door Switch
Once you've confirmed the switch is faulty, replacement is usually straightforward.
Step 1: Ensure Power is Disconnected (Again!)
Seriously, double-check that the oven is unplugged or the breaker is off.
Step 2: Access the Old Switch
Follow the same steps you used to access the switch for testing. Make sure you have clear access to its mounting screws or clips.
Step 3: Remove the Old Switch
Unscrew any mounting screws holding the switch in place. If it's held by clips, you might need to gently pry them open. Carefully remove the old switch.
Step 4: Install the New Switch
Take your new replacement switch. Ensure it's the correct part for your oven model. Position the new switch in the same orientation as the old one. Secure it with the screws or clips. Refer back to your photo to correctly reattach the wires to the terminals.
The referenced video (Oven Door Switch Testing & Replacement) also provides excellent visuals for the removal and installation process.
Step 5: Reassemble and Test
Carefully reassemble any panels or components you removed. Once everything is back in place, restore power to the oven. Test the oven light by opening and closing the door. If applicable, try starting a heating cycle or the self-clean function to ensure everything is working as it should.
Troubleshooting Tips (If Replacement Doesn't Fix It)
If replacing the door switch doesn't resolve your oven's issue, don't despair! Here are a few other things to consider:
- Double-Check Wiring: Ensure all connections are secure and correctly matched according to your photo.
- Door Latch Assembly: On some models, a separate door latch assembly works in conjunction with the door switch, especially for self-cleaning. This could be faulty.
- Oven Control Board: In rare cases, the issue might stem from a faulty main control board not properly receiving signals from the switch.
- Light Socket/Bulb: If only the light isn't working, ensure the bulb isn't burned out and the light socket isn't corroded.
- Professional Help: If you've exhausted your DIY options, it might be time to call a qualified appliance technician.
Get Your Oven Back in Action!
A faulty oven door switch can be a minor inconvenience or a major roadblock to your cooking. By following these steps, you can confidently diagnose and replace this common appliance part, restoring your oven's full functionality and ensuring it's safe to use. Ready to tackle your oven repair? Find the exact oven door switch you need for your model right here on our site!