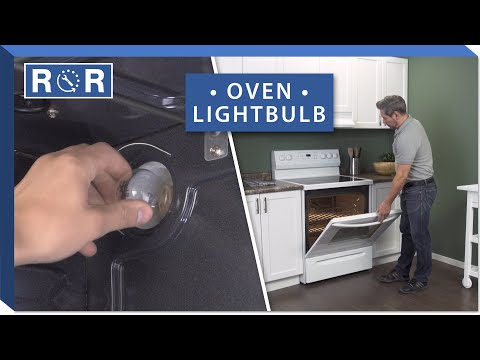
Oven Light Bulb
Shedding Light on Your Oven: Troubleshooting and Replacing Your Oven Light Bulb
There's nothing quite as frustrating as peering into your oven, eager to check on that golden-brown roast or perfectly risen cake, only to be met with darkness. A working oven light bulb isn't just a convenience; it's a vital tool for monitoring your cooking without constantly opening the door, which can lead to heat loss and uneven results. If your oven has gone dark, chances are a simple bulb replacement is all you need. Let's illuminate the process!
Why Your Oven Light Bulb Matters More Than You Think
Beyond the obvious benefit of seeing your food, a functional oven light helps you:
- Monitor Progress: Keep an eye on baking and roasting without letting out precious heat.
- Prevent Over/Under-cooking: Spot when something is done or needs more time at a glance.
- Ensure Safety: Clearly see what you're doing when placing or removing hot dishes.
- Cleanliness: Easily spot spills and crumbs, making oven cleaning more effective.
Is It Just the Bulb? Common Oven Light Problems
Most often, a non-working oven light simply means the bulb has burned out. However, sometimes other issues can be at play:
- Burned-Out Bulb: The filament inside the bulb has broken. This is the most common culprit.
- Loose Bulb: Vibrations or a simple jiggle could have loosened the bulb in its socket.
- Faulty Light Switch: The switch that activates the light (often tied to the oven door) might be stuck or broken.
- Socket Issues: The socket itself could be corroded or damaged.
- Wiring Problems: Less common, but frayed or disconnected wires can prevent power from reaching the bulb.
Before assuming the worst, always start with the easiest fix: replacing the bulb.
How to Safely Replace Your Oven Light Bulb
Replacing an oven light bulb is a straightforward DIY task, but safety is paramount. Follow these steps carefully:
Step 1: Prioritize Safety – Disconnect Power!
This is the most crucial step. Always turn off the power to your oven. You can do this by:
- Unplugging the oven from the wall outlet.
- Flipping the circuit breaker for your kitchen or oven in your home's electrical panel.
Also, ensure the oven has cooled completely before you begin to avoid burns.
Step 2: Locate the Bulb and Remove the Protective Cover
The oven light bulb is typically located at the back of the oven cavity or sometimes on a side wall. It's usually protected by a glass or metal cover. To remove the cover:
- Screw-on Cover: Twist the cover counter-clockwise to unscrew it.
- Clip-on Cover: Look for clips or tabs you can gently pry or squeeze to release the cover.
- Screw-fastened Cover: Some covers are held in place by small screws; use a screwdriver to remove them.
For a helpful visual guide on locating and removing the oven light cover and bulb, especially if you're unsure about your specific oven model, watch this video: Oven Light Bulb Replacement Video Guide.
Step 3: Remove the Old Bulb
Once the cover is off, carefully unscrew the old bulb counter-clockwise. If the bulb is broken, you might need to use pliers to grip the metal base, being careful not to cut yourself on any glass fragments. Wear gloves if necessary.
Step 4: Install the New Oven Light Bulb
Before installing, make sure your new bulb is the correct type. Screw the new bulb in clockwise until it's snug, but don't overtighten it. Overtightening can damage the bulb or the socket.
Step 5: Replace the Protective Cover
Securely reattach the protective cover, ensuring it's properly sealed. This cover protects the bulb from grease and food splatters, which can significantly shorten its lifespan.
Step 6: Restore Power and Test
Plug the oven back in or flip the circuit breaker back on. Open the oven door (which often activates the light) or press the light switch. Your oven should now be brightly lit!
Choosing the Right Oven Light Bulb: It's Not Just Any Bulb!
You can't just use any household light bulb in your oven. Oven light bulbs are specially designed to withstand the extreme temperatures inside the oven (up to 450-500°F or 230-260°C). Look for bulbs explicitly labeled as "appliance bulbs" or "oven bulbs." Key factors to consider:
- Heat Resistance: This is non-negotiable. Regular bulbs will shatter or burn out quickly.
- Wattage: Match the wattage of your old bulb or consult your oven's user manual to avoid overloading the circuit. Common wattages are 25W or 40W.
- Base Type: Most oven bulbs use an E26 (standard screw-in) or E17 (intermediate screw-in) base, but always double-check.
Your oven's user manual is the best resource for finding the exact specifications for your replacement bulb.
Maintenance Tips for a Long-Lasting Oven Light
- Keep the Cover Clean: A dirty cover can dim the light and trap heat, potentially reducing bulb life.
- Avoid Overtightening: As mentioned, this can damage the bulb or socket.
- Handle with Care: Oils from your skin can create hot spots on the glass, leading to premature failure. Use a cloth or gloves when handling new bulbs.
When to Call a Professional
If replacing the bulb doesn't solve the problem, or if you suspect issues with the wiring, light switch, or socket, it's best to call a qualified appliance repair technician. Electrical work can be dangerous, and professional help ensures your oven is fixed safely and correctly.
Shine a Light on Your Cooking Adventures!
A dark oven is a minor inconvenience with a simple solution. By following these steps, you can quickly and safely replace your oven light bulb, bringing clarity back to your culinary creations. Happy baking!