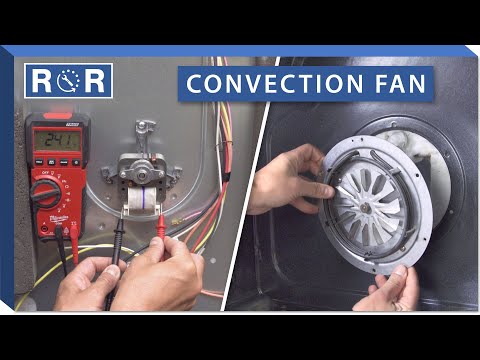
Oven Convection Fan - Motor Testing & Replacement
Is Your Convection Oven Failing to Deliver? How to Test and Replace Your Fan Motor
There's nothing quite like the even, efficient cooking of a convection oven. Whether you're baking a batch of cookies, roasting a chicken, or simply reheating leftovers, the circulating hot air ensures consistent results and often faster cooking times. But what happens when your trusty convection oven starts letting you down? If you're noticing unevenly cooked food, longer preheat times, or strange noises coming from your appliance, the culprit might just be the unsung hero of your oven: the convection fan motor.
A faulty convection fan motor can turn your culinary dreams into crispy nightmares. The good news is that diagnosing and replacing this part is often a manageable DIY repair. In this guide, we'll walk you through the symptoms of a failing fan motor, how to test it, and the steps to replace it, saving you money and getting your oven back to peak performance.
Why Your Oven's Convection Fan is So Important
Unlike traditional ovens that rely solely on radiant heat, convection ovens incorporate a fan (and sometimes a dedicated heating element) to circulate hot air throughout the oven cavity. This forced air movement helps to:
- Cook food more evenly by eliminating hot and cold spots.
- Reduce cooking times, as heat is transferred more efficiently.
- Create crispy exteriors and moist interiors for roasted meats and baked goods.
- Brown foods more consistently.
When the convection fan motor fails, these benefits are lost, and your oven essentially reverts to a standard model, often with suboptimal results due to its design for convection.
Symptoms of a Failing Convection Fan Motor
Catching the problem early can prevent further issues (and ruined meals!). Look out for these common signs:
- Uneven Cooking: One side of your dish is burnt while the other is undercooked.
- Unusual Noises: Grinding, squealing, buzzing, or rattling sounds coming from the oven, especially when the convection mode is active.
- Fan Not Spinning: The fan blade inside the oven cavity doesn't move when convection is selected.
- Longer Cooking Times: Your oven takes significantly longer to cook dishes than it used to.
- Oven Error Codes: Some modern ovens may display specific error codes related to fan malfunctions.
Safety First: Always Disconnect Power!
Before you begin any inspection or repair work on your oven, safety is paramount. You'll be working with electrical components, so always:
- Unplug the oven from its power outlet.
- If it's a hard-wired oven or you can't easily access the plug, turn off the corresponding circuit breaker in your home's electrical panel.
It's also a good idea to wear work gloves to protect your hands from sharp edges.
Accessing the Convection Fan Assembly
To get to the fan motor, you'll need to remove some internal components. The exact steps can vary slightly by oven model, but generally:
- Remove all oven racks.
- Locate the rear panel inside the oven cavity. This is usually held in place by several screws.
- Carefully remove the screws and pull the panel away.
- Behind this panel, you'll usually find a fan cover or baffle. Remove any screws securing this as well.
Once these covers are off, you should see the convection fan blade and the motor assembly behind it. For a visual guide on how to safely access these components, check out this helpful video: Oven Convection Fan - Motor Testing & Replacement.
Testing Your Convection Fan Motor
Once you have the motor exposed, you can perform a few tests to confirm if it's the source of the problem:
1. Visual Inspection
Look for any obvious signs of damage:
- Burn marks or melted wires.
- Debris or obstructions around the fan blade.
- Loose or disconnected wiring.
2. Manual Spin Test
With the power still disconnected, try to spin the fan blade by hand. It should spin freely and smoothly. If it's stiff, wobbly, or makes grinding noises, the motor bearings are likely worn out, indicating a faulty motor.
3. Electrical Continuity Test (Multimeter Required)
This test determines if the motor's internal windings are intact.
- Carefully disconnect the wires leading to the convection fan motor. Note their positions or take a photo for reassembly.
- Set your multimeter to the ohms (Ω) setting, typically in the R x 1 or R x 10 range, or the continuity setting if your meter has one.
- Touch one multimeter probe to each of the motor's electrical terminals.
- A good motor should show a resistance reading (e.g., between 5 and 50 ohms). If the multimeter displays "OL" (open loop), "1" (infinity), or no reading at all, it indicates an open circuit, and the motor is bad. A reading of 0 ohms (short circuit) also indicates a faulty motor.
The provided video offers a clear demonstration of how to use a multimeter to test your convection fan motor for continuity, which can be very helpful if you're new to using this tool.
Replacing the Convection Fan Motor
If your tests confirm the motor is faulty, it's time for a replacement. Make sure you have the correct replacement part for your oven model.
- Disconnect Wires: If you haven't already, carefully disconnect all wires from the motor terminals.
- Remove Fan Blade: The fan blade is usually secured to the motor shaft with a nut or a screw. You may need a socket wrench or screwdriver to remove it. Sometimes, a fan puller tool is necessary if the blade is stuck.
- Remove Mounting Screws: The motor itself is typically held in place by several screws (often 3 or 4) that attach it to the oven's rear panel. Remove these screws.
- Remove Old Motor: Carefully pull the old motor assembly out from the oven.
- Install New Motor: Reverse the steps to install your new convection fan motor.
- Mount the new motor using the screws.
- Reattach the fan blade securely to the motor shaft. Ensure it's facing the correct direction and spins freely without hitting anything.
- Reconnect the electrical wires to the motor terminals, making sure they are secure and in their original positions.
Watching the replacement process in the video can be incredibly helpful to ensure you're tackling each step correctly and confidently.
Reassembly and Final Test
Once the new motor is installed:
- Replace the fan cover/baffle and secure it with its screws.
- Reattach the main rear panel inside the oven cavity.
- Replace the oven racks.
- Plug your oven back in or restore power at the circuit breaker.
- Turn on your oven and select a convection bake or roast setting. Listen for smooth operation of the fan and check for even heat distribution.
When to Call a Professional
While testing and replacing a convection fan motor is a common DIY repair, there are times when it's best to call in a qualified appliance technician:
- If you're uncomfortable working with electrical components.
- If you can't definitively diagnose the problem.
- If the issue persists after replacing the motor.
- If accessing the motor proves too difficult or requires specialized tools you don't have.
Get Your Oven Back to Baking Bliss!
A properly functioning convection fan is key to enjoying all the benefits of your modern oven. By understanding the symptoms, safely testing the motor, and confidently replacing it, you can often restore your appliance to its former glory without the expense of a service call or a brand new oven. Happy cooking!