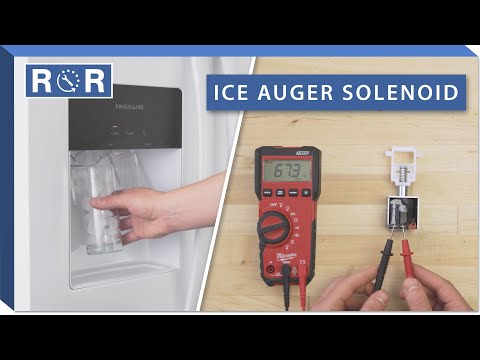
Ice Dispenser Solenoid (Testing & Replacement)
Is Your Ice Dispenser Stuck? It Might Be the Solenoid!
There's nothing quite as frustrating as craving a refreshing glass of iced water or a frosty beverage, only to find your refrigerator's ice dispenser refusing to cooperate. While several issues can lead to a silent or stubborn ice dispenser, one common culprit hiding behind the scenes is the ice dispenser solenoid. Don't rush to call a technician just yet! With a little know-how and the right tools, you might be able to diagnose and even fix the problem yourself.
What Exactly is an Ice Dispenser Solenoid?
Think of the ice dispenser solenoid as a tiny, yet mighty, gatekeeper. When you press the dispenser paddle, an electrical signal is sent to this solenoid. It's essentially an electromagnet that, when energized, pulls a plunger or lever. This action opens a flap or gate, allowing the ice from the bin to fall through the chute and into your glass. When the solenoid fails, that gate stays shut, and your ice stays put.
Signs Your Ice Dispenser Solenoid Might Be Faulty
How do you know if the solenoid is the problem? Look out for these tell-tale symptoms:
- No Ice Dispensed: You press the paddle, the auger motor might hum or spin, but no ice comes out.
- Weak or Partial Dispense: Only a few cubes tumble out, or the flow is inconsistent.
- Humming But No Action: You hear a buzzing sound when you press the paddle, but the ice still won't drop. This often indicates the solenoid is receiving power but isn't physically moving the gate.
- Ice Stuck in Chute: Sometimes, the solenoid plunger might be partially stuck, preventing the flap from fully opening or closing, leading to ice jams.
Safety First: Always Unplug Your Refrigerator!
Before you even think about opening up your refrigerator, please prioritize safety. Anytime you're working with electrical components or moving parts, it's crucial to:
- Unplug the refrigerator from the wall outlet.
- If unplugging isn't feasible, trip the circuit breaker that powers the refrigerator.
- Wear appropriate safety gear, like gloves, if needed.
Neglecting this step can lead to serious injury or damage to your appliance.
Tools You'll Need for Testing & Replacement
Gathering your tools beforehand will make the job much smoother:
- Nut driver set or a screwdriver with various bits (Phillips, flathead)
- Multimeter (for testing continuity)
- Needle-nose pliers
- New ice dispenser solenoid (ensure it's the correct part for your specific refrigerator model)
- Work gloves (optional, but recommended)
- Small container for screws
How to Test Your Ice Dispenser Solenoid
Testing the solenoid for continuity is the most reliable way to determine if it's the culprit. For a great visual guide on accessing and testing the solenoid, we highly recommend watching this video: Ice Dispenser Solenoid Testing & Replacement.
- Access the Dispenser Assembly: This usually involves removing the grille or trim around the dispenser area. You might need to open the freezer door to access screws from the inside. Refer to your refrigerator's owner's manual or the linked video for specific instructions for your model.
- Locate the Solenoid: Once you've removed the outer panels, you'll typically find the solenoid near the ice chute or the dispenser mechanism. It's usually a small, cylindrical component with a plunger or lever attached and wires leading to it.
- Disconnect Power (Again!): Double-check that the refrigerator is unplugged.
- Disconnect Wires: Carefully disconnect the electrical wires leading to the solenoid. You might need needle-nose pliers to gently pull the connectors apart.
- Set Your Multimeter: Turn your multimeter to the ohms (Ω) setting, typically in the R x 1 or R x 10 range.
- Test for Continuity: Place one probe of the multimeter on each terminal of the solenoid.
- Good Solenoid: You should get a reading, usually between 100 and 500 ohms, depending on the solenoid. This indicates electrical continuity.
- Bad Solenoid: If the multimeter shows no reading (open circuit or OL/infinity), the solenoid is faulty and needs replacement. If it shows 0 ohms (short circuit), it's also bad.
- Manual Test (Optional): With the solenoid still disconnected electrically, you can sometimes manually push the plunger to see if the flap moves freely. If it's stiff or stuck, that's another indicator of a problem.
How to Replace Your Ice Dispenser Solenoid
If your multimeter test confirmed a faulty solenoid, it's time for a replacement. The replacement process is often a reversal of the removal, but here's a step-by-step guide, again referencing the helpful video Ice Dispenser Solenoid Testing & Replacement for visual assistance:
- Purchase the Correct Part: Before starting, ensure you have the correct replacement solenoid for your refrigerator's make and model. Appliance parts are often specific!
- Disconnect Power: (Yes, we're repeating this because it's that important!) Ensure the refrigerator is unplugged.
- Remove the Old Solenoid:
- If you haven't already, disconnect the electrical wires from the faulty solenoid.
- Unscrew any mounting screws holding the solenoid in place.
- Carefully detach the solenoid's plunger or lever mechanism from the ice dispenser flap/gate. This might involve unhooking a spring or removing a pin.
- Remove the old solenoid.
- Install the New Solenoid:
- Position the new solenoid in the same orientation as the old one.
- Attach the plunger or lever mechanism to the ice dispenser flap/gate. Make sure it moves freely and isn't binding.
- Secure the new solenoid with its mounting screws.
- Reconnect the electrical wires to the solenoid terminals. Ensure they are firmly seated.
- Reassemble the Dispenser: Put all the panels and trim back in place, securing them with the screws you removed earlier. Don't overtighten.
- Test Your Repair: Plug the refrigerator back in or restore power at the circuit breaker. Press the ice dispenser paddle. You should now hear the solenoid click and see ice dispensing smoothly.
Still No Ice? Other Potential Culprits
If you've tested and replaced the solenoid and your ice dispenser is still on strike, here are a few other areas to investigate:
- Ice Auger Motor: The motor that turns the auger to push ice out might be faulty. You'd typically hear no sound or a grinding noise when trying to dispense.
- Control Board/Switch: The dispenser paddle switch itself or the main control board might not be sending power to the solenoid or auger motor.
- Clogged Ice Chute: Sometimes, ice can melt and refreeze, creating a blockage in the chute. A hairdryer on a low setting (with the power off!) can help melt stubborn clogs.
- Water Inlet Valve: If your ice maker isn't producing ice at all, the water inlet valve could be clogged or faulty.
Get Your Ice Flowing Again!
Diagnosing and replacing an ice dispenser solenoid is a manageable DIY repair for many homeowners. By following these steps and using resources like the provided video, you can save money and get your appliance back to full functionality. If you're unsure at any point or prefer professional assistance, don't hesitate to contact a qualified appliance repair technician. They can quickly diagnose complex issues and get your ice flowing smoothly once more!