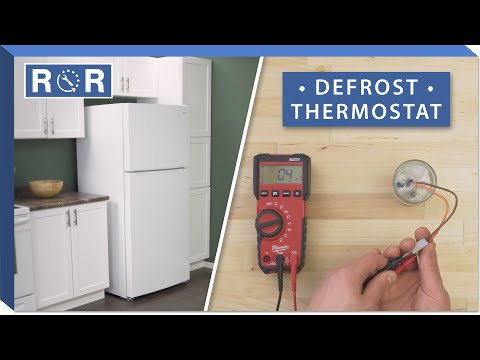
How to Test & Replace a Defrost Thermostat in a Refrigerator
Is Your Fridge Freezing Up? How to Test & Replace a Refrigerator Defrost Thermostat
Few things are as frustrating as opening your freezer door only to find a thick layer of ice coating everything, or worse, discovering your refrigerator isn't cooling properly because of excessive frost. Often, the culprit behind these issues is a malfunctioning defrost thermostat. This small, yet critical, component plays a vital role in your refrigerator's defrost system, preventing frost buildup and ensuring efficient operation.
In this comprehensive guide, we'll walk you through everything you need to know about testing and replacing a defrost thermostat in your refrigerator. With a little patience and the right tools, you can often tackle this repair yourself, saving money and extending the life of your appliance.
What is a Defrost Thermostat and Why is it Important?
Your refrigerator's defrost system is designed to melt away frost that accumulates on the evaporator coils. This system typically consists of a defrost heater, a defrost timer or control board, and the defrost thermostat. The defrost thermostat acts as a safety switch, monitoring the temperature of the evaporator coils. When the coils get cold enough (usually below freezing), the thermostat closes, allowing power to flow to the defrost heater to melt the frost. Once the coils reach a certain temperature (typically above 40°F or 4°C), the thermostat opens, cutting power to the heater and preventing the freezer from getting too warm.
Without a properly functioning defrost thermostat, your defrost heater might run too long (overheating the freezer) or not at all (leading to excessive frost buildup), causing inefficient cooling, increased energy consumption, and potential food spoilage.
Symptoms of a Failing Defrost Thermostat
Recognizing the signs of a faulty defrost thermostat can help you diagnose the problem quickly:
- Excessive Frost Buildup: This is the most common symptom. If you see a thick layer of ice on the back panel of your freezer or covering the evaporator coils, it's a strong indicator.
- Refrigerator Not Cooling, Freezer is Fine: Frost buildup can block airflow to the refrigerator compartment, causing it to warm up while the freezer remains cold.
- Frequent Cycling: The compressor might run more often than usual as it struggles to maintain temperature due to the frost barrier.
- Warm Freezer: In rare cases, if the thermostat fails in the "closed" position, the defrost heater might run excessively, warming the freezer compartment and potentially melting food.
- Water Leaks: Excessive frost that melts and refreezes can block the drain tube, leading to water accumulation and leaks inside or under the refrigerator.
Safety First!
Before attempting any repair on your refrigerator, always prioritize safety:
- Unplug the Refrigerator: Disconnect the appliance from the power outlet to prevent electrical shock.
- Clear the Freezer: Remove all food items from the freezer. It's a good idea to have a cooler ready to store frozen goods.
- Wear Gloves: Protect your hands from sharp edges and cold temperatures.
Tools You'll Need
- Screwdrivers (Phillips and Flathead)
- Nut drivers or a socket set (various sizes, depending on your model)
- Multimeter (with continuity setting)
- Wire cutters and strippers (if splicing wires)
- Crimp connectors (if splicing wires)
- New defrost thermostat (ensure it's compatible with your refrigerator model)
- Ice water (for testing)
Locating the Defrost Thermostat
The defrost thermostat is typically located inside the freezer compartment, clipped directly onto one of the evaporator coils. You'll usually find it behind the back panel of the freezer. To access it, you'll need to:
- Empty the freezer compartment.
- Remove any shelving or ice maker components that block access to the back panel.
- Unscrew and carefully remove the back panel of the freezer. This will expose the evaporator coils, defrost heater, and the defrost thermostat.
For a visual guide on locating and accessing the defrost thermostat, you might find this video helpful: How To Test Refrigerator Defrost Thermostat. While specific locations may vary by brand and model, the general procedure shown can be very illustrative.
How to Test a Defrost Thermostat (Step-by-Step)
Once you've located the defrost thermostat, you can test it using a multimeter:
- Disconnect the Thermostat: Gently disconnect the wires leading to the defrost thermostat. You might need to cut the wires if they are crimped directly to the thermostat, but try to find a connector first.
- Prepare Your Multimeter: Set your multimeter to the continuity setting (usually indicated by a speaker icon or an ohm symbol).
- Perform Room Temperature Test: Touch the multimeter probes to the two terminals of the defrost thermostat.
- Expected Result (Room Temp): If the thermostat is above its cut-in temperature (usually around 40°F or 4°C), it should be an "open" circuit. Your multimeter should show no continuity (no beep, or "OL" for overload/open loop). If it shows continuity at room temperature, it's faulty and needs replacement.
- Perform Cold Temperature Test: Place the defrost thermostat in a glass of ice water (ensure the terminals don't get wet, or dry them thoroughly after). Let it sit for a few minutes to cool down to below freezing.
- Expected Result (Cold Temp): While still in the ice water (or immediately after removing it), re-test for continuity. If the thermostat is working correctly, it should now show continuity (your multimeter should beep or show a low resistance reading). If it still shows no continuity, it's faulty and needs replacement.
The provided video demonstrates this continuity test clearly, showing how to check for an open or closed circuit depending on the temperature. If your thermostat fails either of these tests, it's time for a replacement.
How to Replace a Defrost Thermostat (Step-by-Step)
Replacing a faulty defrost thermostat is usually straightforward:
- Ensure Power is Off: Double-check that your refrigerator is unplugged.
- Access the Thermostat: If you disconnected the thermostat for testing, proceed. If not, follow the steps in the "Locating" section to access it.
- Remove the Old Thermostat:
- Note how the old thermostat is clipped onto the evaporator coil.
- If the wires were cut for testing, cut them again closer to the thermostat to get a clean edge. If there were connectors, simply disconnect them.
- Install the New Thermostat:
- If your new thermostat has identical connectors, simply plug it in.
- If you need to splice wires, use wire strippers to expose about half an inch of bare wire on both the refrigerator's wiring harness and the new thermostat's wires. Use appropriate crimp connectors to securely join the wires. Ensure the connection is tight and insulated.
- Clip the new thermostat securely onto the same evaporator coil location as the old one. Make sure it makes good contact with the coil.
- Reassemble: Carefully reattach the freezer's back panel, making sure no wires are pinched. Replace any shelves or ice maker components.
- Restore Power: Plug the refrigerator back into the electrical outlet.
- Monitor Performance: Give your refrigerator 24-48 hours to return to optimal operating temperatures and to observe if the frost buildup issue has been resolved.
Troubleshooting Tips
If you've replaced the defrost thermostat and your refrigerator is still experiencing issues:
- Check the Defrost Heater: The defrost heater itself could be faulty. You can test it for continuity similar to the thermostat.
- Inspect the Defrost Timer/Control Board: The defrost timer (in older models) or the main control board (in newer models) might not be initiating the defrost cycle. This is a more complex repair.
- Ensure Proper Door Seal: A leaky door gasket can allow warm, moist air into the freezer, leading to excessive frost even with a working defrost system.
Conclusion
A failing defrost thermostat is a common refrigerator problem that can lead to significant inconvenience and energy waste. By understanding its function, recognizing the symptoms of failure, and following these step-by-step instructions for testing and replacement, you can confidently diagnose and repair your appliance. Don't let a little ice get in the way of your perfectly chilled food!
If you need a replacement defrost thermostat or any other appliance part, be sure to visit our online store for a wide selection of genuine and compatible parts.