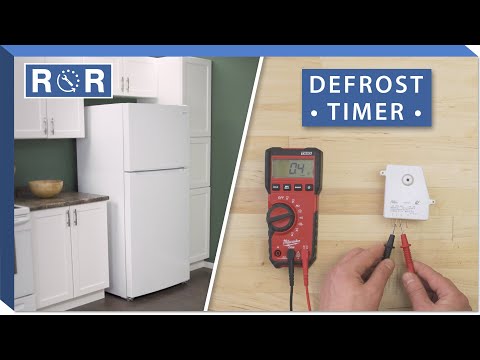
How to Test & Replace a Defrost Timer in a Refrigerator
Is your refrigerator struggling to keep things cool, or worse, building up a frosty fortress in the freezer? While many culprits can lead to these frustrating issues, a faulty defrost timer is a surprisingly common one. This small, often overlooked component plays a critical role in your refrigerator's health, preventing excessive ice buildup and ensuring efficient cooling.
In this guide, we'll walk you through how to identify the symptoms of a bad defrost timer, how to test it, and how to replace it yourself, potentially saving you a costly service call. Get ready to put your DIY hat on!
What Does a Refrigerator Defrost Timer Do?
Before diving into repairs, it's essential to understand the defrost timer's function. Modern refrigerators don't just cool; they also regularly defrost to prevent ice from accumulating on the evaporator coils. The defrost timer is the brain behind this operation. It cycles between cooling mode (running the compressor and fan) and defrost mode (turning on the defrost heater) at regular intervals, typically every 6 to 10 hours for about 20-30 minutes.
When the defrost timer malfunctions, it can get stuck in either mode:
- Stuck in Cooling Mode: The defrost heater never turns on, leading to a significant buildup of ice on the evaporator coils. This ice acts as an insulator, preventing cold air from circulating, resulting in a warm refrigerator section while the freezer might still be cold (but inefficiently).
- Stuck in Defrost Mode: The defrost heater stays on too long, causing the freezer to get too warm and potentially melting contents. This is less common but can happen.
Safety First: Unplug Your Refrigerator!
Before you begin any diagnostic or repair work on your refrigerator, the absolute most important step is to disconnect it from the power supply. Unplug it from the wall outlet. Do NOT rely on just flipping a breaker, as some components may still hold a charge. Electrical shock can be dangerous or even fatal.
Locating the Defrost Timer
The defrost timer isn't always in the same spot across all refrigerator models, but common locations include:
- Behind the kick plate: Often found at the bottom front of the refrigerator.
- Inside the control panel: Typically located near the temperature controls in the fresh food compartment or behind the freezer's top panel.
- Near the compressor: Sometimes mounted on the back of the refrigerator, close to the compressor.
Your appliance's owner's manual is the best resource for precise location. If you don't have it, a quick online search with your refrigerator's make and model number should provide diagrams or manuals. For a visual example of a common location (in the control panel of a top-freezer model), check out the beginning of this helpful video: How to Test a Refrigerator Defrost Timer.
Testing the Defrost Timer (Manual Advance Method)
The most common and easiest way for a DIYer to test a defrost timer is by manually advancing it. This method doesn't require special tools and can quickly tell you if the timer is stuck.
Steps to Manually Advance the Timer:
- Access the Timer: Locate and carefully remove any covers or panels to expose the defrost timer. You might need a screwdriver.
- Locate the Advance Knob/Slot: Most defrost timers have a small knob or a slot that can be turned with a flat-head screwdriver.
- Manually Advance: With the refrigerator still plugged in (for this test ONLY, be cautious around exposed wires), slowly turn the knob/slot clockwise. You should hear a distinct "click" as the timer transitions between modes. Keep turning it until you hear another click.
- Observe the Refrigerator:
- If it clicks into defrost mode: The compressor and evaporator fan should shut off, and if your coils are iced over, you should eventually hear sizzling or dripping sounds as the defrost heater begins to melt the ice. This typically takes 5-10 minutes to become noticeable.
- If it clicks into cooling mode: The compressor and fan should immediately kick back on.
What the Test Results Mean:
- If you can't manually advance the timer, or it won't click into defrost mode, or the defrost heater doesn't activate: The timer is likely faulty and needs replacement. The video referenced above demonstrates this manual advance very clearly around the 0:50 mark.
- If it advances and everything works as expected: The timer itself might be okay, and the problem could lie with the defrost heater, defrost thermostat, or even the main control board. However, a timer can still be intermittently faulty, so if symptoms return, it's still a strong suspect.
Replacing the Defrost Timer
If your testing indicates a bad defrost timer, replacing it is a relatively straightforward repair.
What You'll Need:
- New defrost timer (ensure it's compatible with your refrigerator's make and model)
- Screwdrivers (Phillips and/or flat-head)
- Needle-nose pliers (optional, for wire connectors)
- Your phone or camera (to take pictures of wiring)
Replacement Steps:
- Unplug the Refrigerator: This cannot be stressed enough. Always disconnect power.
- Access the Timer: Remove the necessary panels or covers to expose the old defrost timer.
- Document Wiring: This is crucial! Take clear photos of how the wires are connected to the old timer. There are typically four wires, and getting them wrong can cause damage. The video shows the removal of the old timer and its wiring around the 1:50 mark.
- Disconnect Wires: Carefully pull each wire connector off the terminals of the old timer. You might need needle-nose pliers for stubborn connections.
- Remove Old Timer: Unscrew or unclip the old timer from its mounting bracket.
- Install New Timer: Mount the new defrost timer in the same location and secure it with screws or clips.
- Reconnect Wires: Using your photos as a guide, connect each wire to the corresponding terminal on the new timer. Ensure connections are snug.
- Replace Covers: Reinstall any panels or covers you removed.
- Plug In and Test: Plug your refrigerator back into the power outlet. Listen for the compressor and fan to start. Monitor your refrigerator's performance over the next 24-48 hours to ensure proper cooling and defrost cycles.
Tips for Success & When to Call a Pro
- Source the Correct Part: Always use your refrigerator's full model number to find an exact replacement defrost timer. Generic parts might not work correctly or last as long.
- Double-Check Connections: A loose wire can prevent the timer from functioning.
- Be Patient: It can take several hours for a refrigerator to reach its optimal temperature after being unplugged, and for the defrost cycle to fully operate.
- When to Call a Professional: If you've replaced the defrost timer and your refrigerator still isn't working correctly, or if you're uncomfortable with electrical work, don't hesitate to call a qualified appliance repair technician. Other components like the defrost heater, defrost thermostat, or main control board could be at fault.
Replacing a defrost timer is a manageable DIY repair that can restore your refrigerator's efficiency and prevent costly food spoilage. With a little patience and the right guidance, you can tackle this common appliance issue yourself!