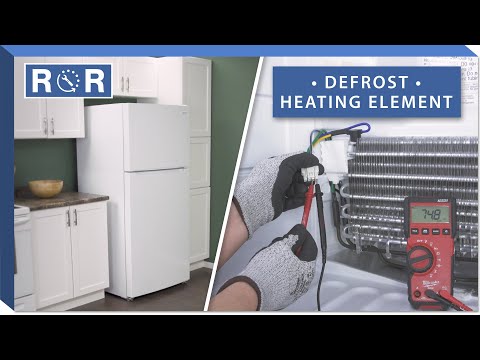
How to Test & Replace a Defrost Heater in a Refrigerator
Is your freezer looking more like an arctic cave than a food storage unit? Are you constantly chipping away at stubborn ice buildup? Chances are, your refrigerator's defrost heater might be to blame. This crucial component ensures your fridge and freezer don't turn into giant blocks of ice, allowing your appliance to run efficiently and your food to stay properly preserved.
A failing defrost heater is a common culprit behind excessive ice, poor cooling, and even potential water leaks. The good news? Testing and replacing this part is a DIY project many homeowners can tackle, saving a significant amount on repair costs. In this guide, we'll walk you through how to diagnose and swap out a faulty defrost heater, keeping your refrigerator humming along smoothly.
What Does a Defrost Heater Do?
Most modern refrigerators use an automatic defrost system to prevent ice accumulation on the evaporator coils. The defrost heater is a key part of this system. Periodically, usually every 8-12 hours, a defrost timer or control board activates the heater. This melts any frost that has formed on the evaporator coils, and the resulting water drains through a tube to a pan beneath the fridge, where it evaporates. Without a working defrost heater, ice builds up, blocking airflow and eventually impairing your refrigerator's cooling capabilities.
Symptoms of a Failing Defrost Heater
Before you grab your tools, it's important to confirm that the defrost heater is indeed the problem. Look out for these common signs:
- Excessive Frost/Ice Buildup in the Freezer: This is the most obvious sign. You might see thick layers of ice on the back wall of the freezer compartment, over the evaporator cover.
- Refrigerator Not Cooling, Freezer Still Works (Somewhat): If the evaporator coils are completely encased in ice, cold air can't circulate effectively into the refrigerator section, leading to warm food despite the freezer feeling cold.
- Food Spoilage: Due to inconsistent temperatures.
- Water Leaks: As ice builds up and then melts irregularly, it can overflow the drain pan or block the drain tube, causing water to leak inside or outside your fridge.
- Refrigerator Runs Constantly: The compressor works overtime trying to cool the appliance, leading to higher energy bills.
Safety First: Unplug Your Refrigerator!
Before attempting any repair on an electrical appliance, always prioritize safety. Unplug your refrigerator from the wall outlet. If you can't reach the plug, trip the circuit breaker that supplies power to the refrigerator. This step is non-negotiable to prevent electrical shock.
Tools You'll Need
Gathering your tools beforehand will make the repair process much smoother:
- Phillips and flat-head screwdrivers
- Nut driver set (usually 1/4" or 5/16")
- Multimeter (for testing continuity)
- Wire strippers/cutters (if splicing wires)
- Needle-nose pliers
- Gloves (optional, but good for grip and protection)
- Replacement defrost heater (ensure it's compatible with your specific fridge model)
- Hair dryer or heat gun (to melt ice buildup, if necessary)
Locating the Defrost Heater
The defrost heater is typically located in the freezer compartment, behind the back panel, near the evaporator coils. To access it, you'll need to:
- Remove all food from the freezer.
- Remove any shelves, bins, or ice maker components that block access to the back panel.
- Unscrew and remove the back panel of the freezer compartment. This panel usually covers the evaporator coils.
Once the panel is off, you'll see the evaporator coils. The defrost heater will be a long, thin tube (either glass or metal, sometimes covered in foil) running along the bottom or sometimes woven through the evaporator coils themselves. You can get a good visual idea of this process around the 0:50 mark of the referenced video, where the technician begins to remove the freezer back panel.
If there's a significant amount of ice, you might need to use a hairdryer or heat gun (carefully!) to melt it away to get a clear view and access to the heater and its connections.
How to Test the Defrost Heater (Continuity Test)
A multimeter is essential for testing the defrost heater. We'll be performing a continuity test to see if the electrical circuit within the heater is complete.
Steps for Testing:
- Disconnect the Heater: Locate the wires connecting to the defrost heater. These might be secured with wire nuts or spade connectors. Disconnect them from the rest of the refrigerator's wiring.
- Set Your Multimeter: Turn your multimeter to the continuity setting (often indicated by a symbol resembling a sound wave or diode) or the lowest ohms (Ω) setting.
- Place Probes: Touch one multimeter probe to each of the two terminals or ends of the defrost heater's wires.
- Interpret the Reading:
- Good Heater: If the multimeter beeps (on continuity setting) or shows a low resistance reading (typically between 10-100 ohms, consult your fridge's service manual if unsure), the heater has continuity and is likely working correctly.
- Bad Heater: If the multimeter does not beep or shows an "OL" (over limit) or infinite resistance reading, it means there's a break in the circuit, and the heater is faulty and needs to be replaced.
- Visual Inspection: Even if it tests good, visually inspect the heater for any cracks, burns, or obvious damage, especially if it's a glass tube heater.
How to Replace the Defrost Heater
If your defrost heater failed the continuity test, it's time for a replacement. Make sure you have the exact replacement part for your refrigerator model to ensure compatibility and proper function.
Steps for Replacement:
- Remove Mounting Brackets/Clips: The defrost heater is usually held in place by small metal clips, screws, or mounting brackets. Carefully detach these.
- Disconnect Wires: If you haven't already fully disconnected the wires during testing, do so now. You might need to cut the wires close to the old heater if they are crimped or permanently attached, leaving enough length to splice the new one.
- Carefully Remove the Old Heater: Gently pull the old defrost heater away from the evaporator coils. Be careful not to bend or damage the delicate coils. The video provides a good example of removal around the 3:40 mark.
- Install the New Heater: Position the new defrost heater in the same location and orientation as the old one. Secure it with the original mounting clips or screws.
- Connect the Wires: Connect the wires of the new defrost heater to the refrigerator's wiring. If you cut the old wires, you'll need to strip the ends of both the new heater's wires and the fridge's wires, then use wire nuts or crimp connectors to create a secure, insulated connection. Ensure the connections are tight and correctly matched.
Reassembly and Final Test
- Reinstall the Freezer Back Panel: Carefully screw the back panel of the freezer compartment back into place.
- Replace Shelves and Components: Put back any shelves, bins, or ice maker parts you removed.
- Plug It In: Once everything is securely reassembled, plug your refrigerator back into the electrical outlet or flip the circuit breaker back on.
- Monitor Performance: It will take several hours for the refrigerator to cool down properly and for the defrost cycle to occur. Monitor your freezer over the next day or two to ensure ice buildup is no longer occurring and that cooling is restored.
When to Call a Professional
While testing and replacing a defrost heater is a manageable DIY task, there are times when it's best to call in a professional appliance repair technician:
- If you're uncomfortable working with electrical components.
- If you've replaced the defrost heater, and the problem persists (it might indicate an issue with the defrost thermostat, defrost timer, or control board).
- If you encounter unexpected difficulties or damage other components during the process.
Keep Your Fridge Frost-Free!
A working defrost heater is vital for your refrigerator's efficiency and longevity. By following these steps, you can successfully diagnose and replace this common failure part, saving yourself time, money, and the headache of dealing with a frosty freezer. Enjoy your perfectly cooled, ice-free appliance!