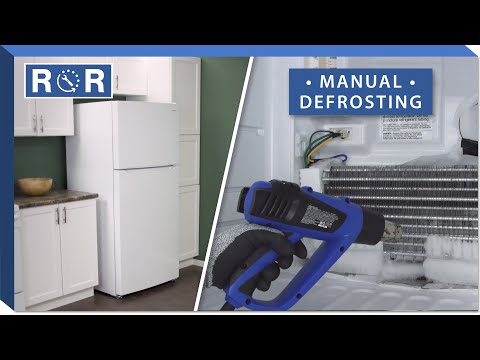
How to Manually Defrost a Freezer
Conquering the Cold: Your Guide to Manually Defrosting a Freezer
Is your freezer starting to look like an arctic cave? Ice buildup is a common freezer problem that goes beyond just being an eyesore. It reduces your appliance's energy efficiency, takes up valuable storage space, and can even compromise food quality or damage your freezer over time. While many modern freezers boast "frost-free" features, older models or those experiencing heavy usage often require a good old-fashioned manual defrost. This guide will walk you through the process, ensuring your freezer runs efficiently and your food stays perfectly preserved.
When to Know It's Time to Defrost
You'll know it's time for a manual defrost when ice accumulation reaches about 1/4 to 1/2 inch thick on the interior walls. Other tell-tale signs include your freezer struggling to maintain its set temperature, increased energy bills, or simply less usable space for your frozen goods. Don't wait until the ice makes opening drawers or finding items a struggle!
Safety First: Important Precautions
Before you begin, remember: safety is paramount. Always unplug your freezer from the power outlet before starting any work. Wear gloves to protect your hands from the cold. And most critically, never use sharp objects like knives or ice picks to chip away at ice. This can easily puncture the freezer lining, leading to refrigerant leaks and irreparable damage to your appliance.
Step-by-Step Guide to Manual Defrosting
1. Prepare and Empty Your Freezer
First, clear everything out of your freezer. Place all frozen food into coolers with ice packs, insulated bags, or consider transferring them to a friend's freezer or a secondary appliance if you have one. Don't forget any ice trays, removable shelves, or bins. Lay down plenty of old towels, newspapers, or a large shallow pan around the base of your freezer to catch melting ice and water.
2. Unplug the Appliance
This step is non-negotiable. Locate the power cord and unplug your freezer completely from the electrical outlet. This not only ensures your safety but also allows the internal temperature to rise, speeding up the defrosting process.
3. Accelerate the Thaw (Optional, but Recommended)
Waiting for ice to melt naturally can take hours. Here are a few safe ways to speed things up:
- Hot Water Bowls: Place bowls of hot water inside the freezer. Close the door to trap the steam, which helps loosen the ice. Replace the water as it cools.
- Fan: Position a regular household fan to blow air directly into the freezer compartment. This can help circulate warmer air and accelerate melting.
- Hair Dryer (with caution): A hair dryer set to a low heat can be used, but keep it at a safe distance from the freezer walls and never let it come into contact with water. Always ensure it's plugged into a Ground Fault Circuit Interrupter (GFCI) outlet for extra safety.
For a visual demonstration of these techniques and more helpful tips on safely and efficiently tackling stubborn ice, check out this helpful video on defrosting a freezer!
4. Safely Remove Ice
As the ice begins to loosen and melt, gently use a plastic or wooden spatula to pry off larger chunks. Remember to avoid any metal tools that could scratch or damage the freezer lining. Collect the ice chunks and dispose of them, along with the melted water pooling at the bottom and on your towels.
5. Clean the Interior
Once all the ice is gone and the freezer is empty, give the interior a good clean. Use a solution of mild dish soap and warm water, or a mixture of baking soda and water (which also helps neutralize odors), to wipe down all interior surfaces. This eliminates any lingering food particles or smells and ensures a hygienic environment for your food.
6. Dry Thoroughly
Before plugging your freezer back in, it's crucial to dry the interior completely with clean, dry towels. Any remaining moisture can quickly turn back into ice once the freezer cools, undoing your hard work and leading to new frost buildup.
7. Restore Power and Refill
Plug your freezer back into the power outlet. Allow it to run for at least 30 minutes to an hour to reach its optimal freezing temperature before returning your food. This helps prevent food from thawing excessively and ensures efficient freezing once items are placed back inside.
Tips for Preventing Future Ice Buildup
- Check Door Seals: Regularly inspect your freezer door seal (gasket) to ensure it's tight and free of cracks. A faulty seal allows warm, moist air to enter, which is the primary cause of frost. Test it by closing the door on a dollar bill; if you can pull the bill out easily, the seal might need replacing.
- Don't Overfill (or Underfill): A full freezer runs more efficiently, but overfilling can block air vents and prevent proper circulation, leading to warm spots and ice. Conversely, an empty freezer has more air space for moisture to condense.
- Limit Door Opening: Every time you open the freezer door, warm, humid air rushes in. Try to be quick and organized when retrieving items.
- Cool Food Before Freezing: Placing hot or warm food directly into the freezer introduces a significant amount of moisture and raises the internal temperature, greatly promoting ice formation. Always let food cool completely before freezing.
Conclusion
Manually defrosting your freezer might seem like a chore, but it's a vital part of appliance maintenance that pays off in the long run. By regularly clearing out ice buildup, you ensure your freezer runs more efficiently, prolong its lifespan, and keep your frozen foods in prime condition. Follow these steps, and you'll enjoy a well-maintained, energy-efficient appliance for years to come!