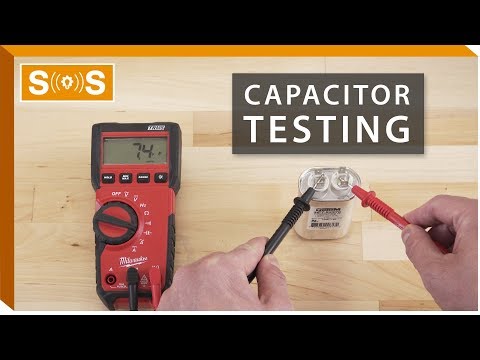
How to Test an HVAC Motor Capacitor
How to Test an HVAC Motor Capacitor
When the summer heat hits, there is nothing worse than turning on your air conditioner only to hear a dull hum instead of the comforting rush of cool air. Often, when an AC unit or furnace blower motor fails to start up, the culprit isn't a dead compressor or a burned-out motor. Instead, it is a small, inexpensive cylinder known as the capacitor. Acting like a temporary battery, the capacitor provides the high-voltage electrical boost needed to kickstart your HVAC motors.
If you suspect your system's capacitor has failed, you do not have to call an expensive technician right away. Testing an HVAC capacitor is a straightforward DIY task that you can safely perform with a standard digital multimeter. In this guide, we will walk you through how to safely diagnose, discharge, and test your capacitor to determine if it is time for a replacement.
Understanding the HVAC Capacitor
Before diving into the testing process, it helps to understand what you are looking at. Most modern residential outdoor AC condensers use a dual run capacitor. This single component has three terminals on top and houses two capacitors in one unit: one for the compressor motor and one for the outdoor fan motor.
The three terminals on a dual capacitor are typically labeled as follows:
C (Common): This terminal connects to the incoming power source.
HERM (Hermetic): This terminal connects to the compressor.
FAN: This terminal connects to the condenser fan motor.
Every capacitor has its electrical rating printed on the side, measured in microfarads (represented by the symbol µF or MFD). For example, you might see "45/5 µF +/- 5%". This means the compressor side should read 45 µF, the fan side should read 5 µF, and a variance of up to 5% is acceptable.
Safety First: How to Safely Discharge a Capacitor
Warning: Capacitors store high-voltage electrical energy even after the power to the HVAC system has been completely turned off. Touching the terminals of a charged capacitor can result in a severe, potentially lethal electrical shock. You must discharge the capacitor before touching the terminals or disconnecting any wires.
To safely discharge the capacitor, first shut off the power to your HVAC unit at the main breaker panel and pull the outdoor disconnect plug near the condenser unit. Once you have verified the power is off, take an insulated screwdriver (holding it strictly by the plastic/rubber handle) and touch the metal shaft across the C terminal and the HERM terminal. Hold it there for a few seconds, then repeat the process between the C terminal and the FAN terminal. This safely bridges the path and releases any stored electrical energy.
Tools Needed for the Job
To accurately test your capacitor, assemble the following tools:
• A digital multimeter capable of measuring capacitance (look for the µF setting).
• An insulated screwdriver.
• Needle-nose pliers (for removing wire connectors).
• Safety glasses and work gloves.
• A smartphone or camera (to take a photo of the wiring before disconnecting anything).
Step-by-Step Guide to Testing Your Capacitor
Once you have gathered your tools and ensured the power is completely disconnected, follow these steps to test the capacitor:
Step 1: Access the Capacitor. Remove the side panel of your outdoor condenser unit to locate the electrical control box. The capacitor is typically secured to the wall of this compartment with a metal strap.
Step 2: Take a Photo. Before disconnecting any wires, take a clear photo of the top of the capacitor. This ensures you know exactly which color wire connects to the C, HERM, and FAN terminals when it is time to reinstall or replace it.
Step 3: Discharge the Capacitor. Using your insulated screwdriver, bridge the terminals as described in the safety section above to release any residual voltage.
Step 4: Disconnect the Wires. Use your needle-nose pliers to gently pull the wire connectors off the terminals. Do not pull on the wires themselves, as this can damage the connections.
Step 5: Set Your Multimeter. Turn on your digital multimeter and set the dial to the capacitance setting (denoted by a capacitor symbol or MFD / µF).
Step 6: Test the Compressor Side (HERM). Place the black meter lead on the C (Common) terminal and the red meter lead on the HERM terminal. Wait a moment for the multimeter to display a reading.
Step 7: Test the Fan Side (FAN). Leave the black lead on the C terminal and move the red lead to the FAN terminal. Note the reading on your meter.
For a detailed visual demonstration of this entire process, including how to set up your multimeter and safely handle the wires, check out this helpful HVAC capacitor testing video guide.
Interpreting Your Multimeter Readings
Compare the numbers on your multimeter screen to the ratings printed on the side of your capacitor. If your capacitor is rated for 45/5 µF with a +/- 5% tolerance, the compressor reading (C to HERM) should be between 42.75 µF and 47.25 µF. The fan reading (C to FAN) should be between 4.75 µF and 5.25 µF.
If either of your readings falls below the acceptable tolerance range, or if the meter reads "OL" (Open Loop) or zero, the capacitor is bad and must be replaced. Additionally, if the top of the capacitor is visibly bulged, swollen, or leaking oil, it has failed physically and should be discarded immediately, even without testing.
Replacing a Failed Capacitor
If your test confirms that the capacitor is dead, replacing it is highly affordable and easy. When purchasing a replacement, you must match the exact microfarad (µF) rating of the original capacitor. However, you can use a capacitor with a higher voltage rating than the original (e.g., replacing a 370V capacitor with a 440V capacitor is perfectly safe, but you must never use a lower voltage rating).
Mount the new capacitor using the existing metal strap, reconnect the wires to their correct terminals using the photo you took earlier as a reference, and restore power to your system. With a fresh capacitor installed, your HVAC system should start up smoothly, saving you the cost of a professional service call!