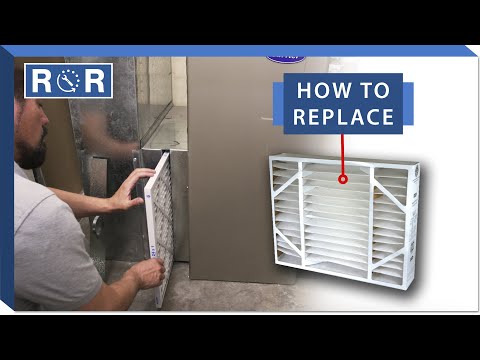
How to Replace a Furnace Filter
Why Regular Furnace Filter Replacement Matters
Your furnace is the heart of your home’s heating and cooling system. To keep it running efficiently, there is one simple maintenance task that reigns supreme: replacing the furnace filter. A clean filter ensures that your system doesn't have to work overtime to circulate warm or cool air throughout your home. When a filter becomes clogged with dust, pet dander, and debris, it restricts airflow, forcing your furnace to run longer and hotter. This not only spikes your monthly energy bills but can also lead to premature system failure and costly repairs.
In addition to protecting your HVAC equipment, a fresh filter is vital for maintaining healthy indoor air quality. If you or your family members suffer from seasonal allergies, asthma, or respiratory sensitivities, changing your filter regularly is one of the easiest ways to breathe easier. Let's walk through how to easily replace your furnace filter yourself, saving you a service call and keeping your home comfortable year-round.
How Often Should You Change Your Furnace Filter?
As a general rule of thumb, most standard 1-inch pleated filters should be replaced every 30 to 90 days. However, the exact frequency depends on several factors in your household:
- Pets: If you have dogs or cats, their fur and dander will clog filters quickly. Consider changing yours every 30 to 60 days.
- Allergies or Asthma: To keep indoor allergens to a minimum, replace the filter every 30 to 45 days.
- Household Size: Larger families naturally generate more dust and airborne particles, requiring more frequent filter changes.
- Filter Thickness: Thicker media filters (4 to 5 inches) are designed to last longer, often requiring replacement only once or twice a year.
Step-by-Step Guide: How to Replace Your Furnace Filter
Replacing your furnace filter is a quick and straightforward DIY project that requires no specialized tools. Follow these simple steps to get the job done safely and correctly:
Step 1: Turn Off the Power
Safety should always be your top priority. Before touching your furnace, turn off the power. You can do this by flipping the switch located on or near the furnace cabinet (which often looks like a standard light switch) or by turning off the appropriate breaker at your home's main electrical panel.
Step 2: Locate the Filter Slot
The furnace filter is typically located in the return air duct next to the furnace blower compartment. Look for a narrow slot with a removable cover or metal door. On some systems, the filter may be located inside the main blower cabinet itself, requiring you to remove the furnace's front access panel.
Step 3: Remove the Old Filter
Slide the old filter out of its slot. Take a moment to inspect it. If it is covered in a gray layer of dust and lint, it is definitely time for a replacement. If you are visual learner and want to see exactly what this process looks like on a real system, you can watch this helpful step-by-step furnace filter replacement video for a clear walkthrough.
Step 4: Verify the Filter Size
Look at the outer cardboard frame of the old filter to find its dimensions (for example, 16x25x1 or 20x20x1). You must replace the filter with one of the exact same dimensions to ensure a proper seal. A filter that is too small will allow dirty air to bypass the filtration media, while one that is too large simply won't fit.
Step 5: Insert the New Filter (Watch the Airflow Arrow!)
This is the most critical step. Look closely at the edge of your new filter. You will see one or more printed arrows indicating the required direction of "Airflow." These arrows must point toward the furnace blower motor (away from the return air duct). Installing a filter backward restricts airflow and reduces the filter's efficiency. Slide the new filter smoothly into the slot.
Step 6: Restore Power and Test
Replace any cover doors or panels you removed. Turn the power switch or circuit breaker back on. Listen to your furnace as it starts up to ensure it runs smoothly without any unusual whistling noises, which could indicate a poorly seated filter.
Understanding MERV Ratings
When shopping for a replacement filter, you will notice a "MERV" (Minimum Efficiency Reporting Value) rating on the packaging. MERV ratings range from 1 to 16 for residential systems:
- MERV 1-4: Basic fiberglass filters. They stop large particles to protect the furnace motor but do very little to improve indoor air quality.
- MERV 5-8: Standard pleated filters. These are highly recommended for most households as they capture dust, mold spores, and pollen without restricting airflow.
- MERV 9-12: High-efficiency filters. Great for pet owners and allergy sufferers, these capture finer particles like pet dander and smoke.
- MERV 13-16: Maximum filtration. These are typically used in commercial settings or specialized residential systems. Be cautious, as ratings this high can restrict airflow in standard residential furnaces if the system is not designed to handle them.
Keep Your HVAC System Running Strong
Regularly replacing your furnace filter is one of the most cost-effective ways to extend the lifespan of your heating and cooling system. Mark your calendar or set a monthly reminder on your phone so you never forget this essential chore. If you notice your furnace is still struggling with airflow or making strange noises even after installing a fresh filter, it may be time to inspect other internal components or consult a professional technician for a system tune-up.