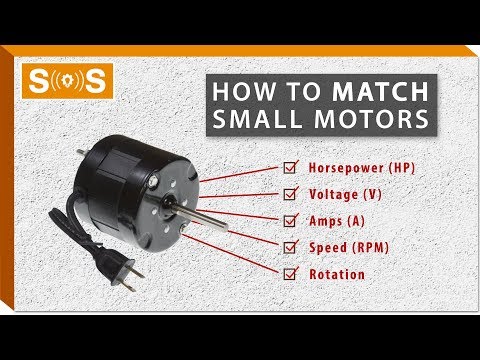
How to Match Small Motors
When a refrigerator stops cooling, a range hood goes silent, or a microwave turntable refuses to spin, a failed small electric motor is often the culprit. Replacing these motors is one of the most common and cost-effective DIY appliance repairs. However, the trickiest part of the job isn't the physical installation—it's finding the exact matching replacement motor.
Installing an incorrect motor can lead to poor appliance performance, electrical shorts, or even a serious fire hazard. Whether you are replacing an evaporator fan motor, a condenser fan motor, or a blower motor, this guide will walk you through the precise steps to match a small electric motor successfully.
Step 1: Locate and Read the Motor's Data Plate
Before you begin searching for a replacement, you must locate the motor's data plate. This is usually a metal plate or a silver sticker adhered to the outer casing of the motor. It contains the "DNA" of the motor, listing its electrical ratings, speed, and model numbers.
Take a clear photograph of this label with your smartphone. Over time, heat and dust can wear away the print on these labels, so having a high-contrast photo will help you zoom in on difficult-to-read numbers. If the label is entirely missing or unreadable, you will need to match the motor using the physical and electrical measurements outlined below.
Step 2: Match the Electrical Specifications
You must never guess when it comes to electricity. When matching a small motor, pay close attention to these three critical electrical specifications:
- Voltage (V): Most residential appliance motors run on 115V or 120V AC, but some (like those in heat pumps, dryers, or ovens) may require 208V, 230V, or 240V. Some small electronic components run on low-voltage DC power (such as 12V DC). You must match the voltage exactly.
- Amperage (A) or Wattage (W): This indicates how much electrical current the motor draws. Your replacement motor should have an amp rating that matches the original as closely as possible. It is generally safe to use a replacement motor with a slightly higher amp rating (as it will run cooler and handle the load easily), but never use one with a lower rating, as it will overheat and fail prematurely.
- Hertz (Hz): In North America, standard household electricity runs at 60Hz. Ensure your replacement matches the hertz rating of your power grid.
Step 3: Determine the Direction of Rotation
One of the most common mistakes DIYers make is buying a motor that spins the wrong way. If you install a fan motor that spins backward, it will suck air instead of blowing it, rendering your appliance useless.
Motor rotation is typically classified as Clockwise (CW) or Counter-Clockwise (CCW). However, the industry standard for determining this direction can be confusing: is it clockwise looking at the front of the shaft, or looking at the back of the motor? To be safe, look at the label for the letters CW or CCW. Usually, this rotation is viewed from the "shaft end" (SE) of the motor. If your motor is "reversible," it will have extra wiring leads that allow you to configure the rotation direction during installation.
For a helpful visual demonstration on how to identify rotation and read these tricky motor labels, check out this useful small motor matching video guide.
Step 4: Match the Speed (RPM)
RPM stands for Rotations Per Minute. This tells you how fast the motor spins. A single-speed fan motor must match the original RPM closely (within 10% is generally acceptable for most small appliance fans). If you are replacing a multi-speed motor (such as a 2-speed or 3-speed range hood motor), ensure the replacement has the same number of speed taps and similar RPM ratings for each speed.
Step 5: Measure the Physical Dimensions
Even if a motor matches electrically, it won't do you any good if it doesn't fit inside the appliance housing. Grab a digital caliper or a precise ruler and measure the following physical dimensions:
- Shaft Diameter and Length: Measure the thickness of the rotating shaft and how far it extends out of the motor body. Standard small motor shafts are often 1/8 inch, 3/16 inch, or 1/4 inch in diameter. Also, note the shape of the shaft—is it perfectly round, or does it have a flat side (known as a "D-shaft") to secure the fan blade?
- Motor Body Diameter and Depth: Measure the width and length of the cylindrical motor housing (often referred to as the frame size, such as C-Frame or 3.3-inch diameter).
- Mounting Style: How does the motor attach to the appliance? Common mounting styles include stud mounts (threaded bolts extending from the front or back of the motor), bracket mounts, or rubber vibration grommets. Measure the distance between the mounting bolts (center-to-center) to ensure they line up with your appliance’s mounting bracket.
Getting the Right Replacement Part
If you have the original manufacturer part number from your appliance manual or the motor label, finding a replacement is easy. But when those numbers aren't available, matching the voltage, rotation, RPM, shaft size, and mounting style will guarantee you get the perfect universal replacement motor for your repair project. Always remember to disconnect the power source to your appliance before attempting any electrical diagnostic work or motor installation!