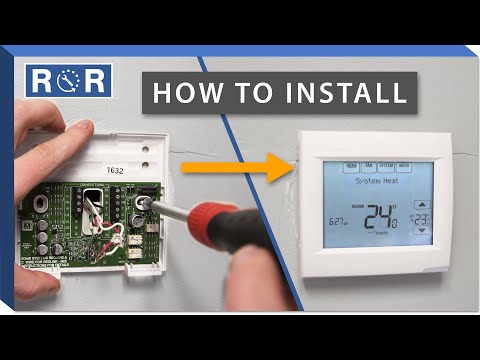
How to Install a Thermostat
How to Install a Thermostat: A Step-by-Step DIY Guide
Upgrading to a new thermostat is one of the easiest and most cost-effective ways to improve your home’s energy efficiency. Whether you are replacing a broken unit or upgrading to a modern, programmable smart thermostat, this project is well within the reach of the average DIYer. By doing it yourself, you can save on professional installation costs and take control of your indoor comfort.
In this guide, we will walk you through the entire process of installing a new thermostat safely and correctly. For a visual walkthrough of the wiring and installation process, be sure to check out our helpful Thermostat Installation Video Guide on YouTube.
Tools and Materials You Will Need
Before you get started, gather the necessary tools. Having everything on hand will make the installation process smooth and efficient:
- Your new thermostat
- Screwdrivers (both flathead and Phillips)
- A smartphone or digital camera (for reference photos)
- Masking tape or wire labels (often included with new thermostats)
- A small level (if not built into your new thermostat)
- Drywall anchors and screws (usually included with the new unit)
- A drill with a small bit (optional, for mounting anchors)
Step 1: Turn Off the Power
Safety is the most important step of any electrical project. Go to your home's main circuit breaker panel and switch off the power to your heating and cooling (HVAC) system. Simply turning off the thermostat on the wall is not enough; you must cut the electrical supply at the breaker to prevent short circuits, blown fuses, or personal injury.
Pro Tip: Verify the power is off by trying to turn on the fan or heat at your current thermostat. If nothing runs, you are safe to proceed.
Step 2: Remove the Old Thermostat Faceplate
Gently pull the decorative faceplate off your old thermostat. Most faceplates snap off easily, though some may require you to loosen a small retaining screw at the bottom. Once removed, you will see the low-voltage wires connected to the sub-base terminal block.
Step 3: Take a Photo of the Current Wiring
Before you disconnect a single wire, take your smartphone and snap a clear, well-lit photo of the existing wiring. Pay close attention to which colored wire connects to which lettered terminal (such as R, W, Y, G, or C). Do not rely solely on the color of the wires, as HVAC installers do not always follow standard color-coding conventions. Your photo will serve as your ultimate blueprint during the installation.
Step 4: Label the Wires and Remove the Old Wall Plate
Use the labels provided with your new thermostat (or small pieces of masking tape) to mark each wire according to the letter on the terminal block it is currently connected to. Once all wires are clearly labeled, use your screwdriver to loosen the terminal screws and carefully pull the wires out.
Next, unscrew the old wall plate from the drywall. As you pull the plate away, gently wrap the wires around a pencil or secure them with tape so they do not slip back inside the wall cavity.
Step 5: Mount the New Thermostat Wall Plate
Thread the wires through the center opening of your new thermostat's wall plate. Hold the plate against the wall and use a small bubble level to ensure it is perfectly straight. Mark the mounting holes on the drywall with a pencil.
If the new mounting holes do not align with the old ones, drill pilot holes and insert the drywall anchors. Position the wall plate back over the holes and secure it firmly with the mounting screws.
Step 6: Connect the Wires to the New Thermostat
Using your photo and the labels you attached earlier, insert each wire into the corresponding terminal on the new baseplate. Most modern thermostats feature push-in terminals or small screw terminals. Ensure the bare copper wire is fully inserted and secure. If you are installing a smart thermostat, make sure you connect the "C" (common) wire, which provides continuous power to the unit.
If you encounter any unique wiring configurations or have questions about system compatibility, refer to the manufacturer's manual or check out our step-by-step wiring video for a detailed visual guide.
Step 7: Attach the Faceplate and Restore Power
Gently push any excess wire back into the wall opening to allow the thermostat to sit flush. Carefully align the new thermostat faceplate over the wall plate and press it firmly until it snaps into place.
Once the unit is securely mounted, head back to your circuit breaker panel and switch the power to your HVAC system back on.
Step 8: Set Up and Test Your New Thermostat
Your new thermostat should power up immediately. If you installed a programmable or smart thermostat, follow the on-screen prompts to connect to your home's Wi-Fi, set the date and time, and establish your heating and cooling schedule.
Finally, test the system by setting the temperature a few degrees higher than the current room temperature to test the heat, and then a few degrees lower to test the air conditioning. Listen for your HVAC system to kick on and verify that air is flowing from the vents.
Troubleshooting Common Issues
If your thermostat does not turn on after restoring power, double-check these common culprits:
- Loose Wires: Turn off the breaker and verify that all wires are securely fastened in their correct terminals.
- The C-Wire: Smart thermostats require a "C" wire to power the screen. If your old system didn't have one, you may need a C-wire adapter kit.
- The HVAC Door Switch: Many furnace blower doors have a safety switch. If the furnace panel door isn't closed completely, power won't flow to the thermostat.
With your new thermostat successfully installed, you can look forward to lower utility bills and a more comfortable home. If you need any replacement parts, mounting accessories, or specialized tools for your home improvement projects, explore our wide selection of high-quality appliance and HVAC components.