Bathroom Exhaust Fan Replacement
Upgrading Your Ventilation: A Step-by-Step Guide to Bathroom Exhaust Fan Replacement
Your bathroom exhaust fan is one of the unsung heroes of your home. It quietly works in the background to eliminate steam, clear away odors, and—most importantly—prevent moisture buildup that leads to toxic mold and mildew. However, when your bathroom fan starts sounding like a jet engine, or if it stops clearing the fog off your mirror altogether, it is time for a replacement.
Replacing a bathroom exhaust fan might seem like a daunting task involving complex electrical work and ducting, but it is actually a highly manageable DIY project. In this comprehensive guide, we will walk you through the signs that your fan is failing, how to choose the right replacement, and a step-by-step guide to installing your new unit.
Signs It Is Time to Replace Your Bathroom Fan
Before you run to the hardware store, it helps to confirm that your fan is actually due for a replacement. Here are the most common warning signs:
- Excessive Noise: If your fan is making grinding, rattling, or squealing noises, the bearings in the motor are likely worn out.
- Slow Startups or No Movement: If you flip the switch and the fan takes several seconds to spin up, or if it hums without moving, the motor is failing.
- Lingering Moisture: If your bathroom walls remain damp and your mirrors stay fogged up long after your shower, the fan is no longer drawing enough air.
- Musty Odors: If a damp, earthy smell persists in your bathroom, your fan isn't doing its job of circulating dry air.
Choosing the Right Replacement Fan
When selecting a new bathroom exhaust fan, you cannot just grab the first one you see on the shelf. You need to consider two critical metrics: CFM and Sones.
CFM (Cubic Feet per Minute): This measures the volume of air the fan can move. A general rule of thumb is that you need 1 CFM for every square foot of bathroom space. For example, an 80-square-foot bathroom requires at least an 80 CFM fan. If you have a jetted tub or a particularly high ceiling, it is wise to size up.
Sones (Noise Level): Sones measure how loud the fan is. A rating of 4.0 sones is quite loud (similar to a television at normal volume), while a rating of 1.0 sone or less is whisper-quiet. If you prefer a peaceful, spa-like bathroom experience, look for a fan rated under 1.5 sones.
Pro Tip: If you want to keep the job simple, try to find a replacement kit that matches your existing fan's brand and housing dimensions. This allows you to swap out the motor and blower assembly without having to tear out the entire metal housing from your ceiling.
Tools and Materials You Will Need
Before beginning the installation, gather the following tools and safety gear:
- New bathroom exhaust fan assembly
- Screwdrivers (flathead and Phillips)
- Non-contact voltage tester
- Wire strippers and wire connectors (wire nuts)
- Drywall saw (if you need to enlarge the ceiling opening)
- Aluminum foil duct tape (do not use standard gray duct tape, as it degrades over time)
- Safety glasses and a dust mask
Step-by-Step Bathroom Exhaust Fan Replacement
If you are replacing just the fan motor and grill (using a direct replacement kit), the process is incredibly fast. If you are replacing the entire housing, follow these standard steps:
Step 1: Turn Off the Power
Safety is the absolute priority when dealing with electricity. Go to your home's main breaker panel and shut off the power to the bathroom circuit. Back in the bathroom, flip the fan switch on and off to confirm the power is dead. Use a non-contact voltage tester inside the fan housing to double-check that no live current is present before touching any wires.
Step 2: Remove the Cover and Old Motor Assembly
Pull the plastic cover grille down slightly. Squeeze the metal torsion springs on either side to release the cover from the housing. Unplug the motor from the internal receptacle. Most fan motors are secured to the housing by a couple of screws or a metal tab system; remove the screws or press the tab to slide the motor assembly out.
Step 3: Disconnect the Housing and Ductwork
If you are replacing the entire metal housing, disconnect the house wires from the fan's junction box. Unscrew the housing from the ceiling joists. You will also need to disconnect the exhaust duct from the fan's damper adapter. Carefully lower the old housing out of the ceiling.
Step 4: Prepare the Ceiling Opening
Compare the size of your new fan housing to the existing hole in your ceiling. If the new housing is larger, hold it up to the ceiling, trace around it with a pencil, and use a drywall saw to carefully enlarge the opening. Be mindful of any hidden wires or plumbing in the ceiling cavity.
Step 5: Install the New Fan Housing
Insert the new housing into the ceiling opening. Secure it to the ceiling joists using the provided mounting brackets or screws. Next, slide the ductwork onto the fan's duct connector and secure it tightly with aluminum foil tape to ensure a airtight seal. A leaky duct will vent moist air directly into your attic, which can cause severe wood rot and mold issues.
Step 6: Wire the New Fan
Open the electrical junction box on the new fan housing. Feed the house electrical wires into the box through a cable clamp. Connect the wires matching color to color: connect the white neutral wire to the white fan wire, the black hot wire to the black fan wire, and the bare or green ground wire to the green grounding screw or wire. Secure the connections with wire nuts and tuck them neatly back into the junction box before screwing the cover plate back on.
Step 7: Insert the Motor and Attach the Grille
Slide the new blower motor assembly into the housing until it clicks or locks into place with its mounting screws. Plug the motor cord into the built-in electrical outlet inside the housing. Finally, squeeze the metal springs of the new plastic grille, insert them into the slots in the housing, and push the grille up flush against the ceiling.
Need a Visual Walkthrough?
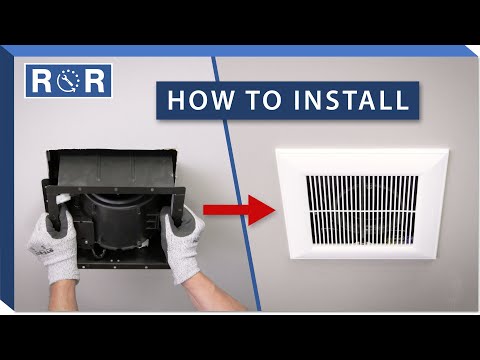
If you prefer to see this process done in real-time before tackling it yourself, watch this detailed Bathroom Exhaust Fan Replacement Video. It provides a clear, step-by-step visual demonstration of how to safely remove your old, noisy fan and install a fresh, quiet replacement unit.
Maintaining Your New Exhaust Fan
To ensure your new exhaust fan operates efficiently for years to come, perform basic maintenance at least twice a year. Dust and lint quickly accumulate on the grille and fan blades, reducing airflow and causing the motor to run hotter. Simply pull down the cover grille, vacuum away any dust build-up using a brush attachment, and wipe down the plastic blades with a damp cloth. With just a little regular care, your bathroom will remain fresh, dry, and mold-free for a long time to come!