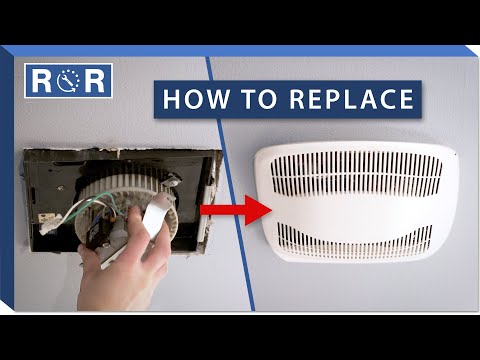
Bathroom Fan Motor
Is Your Bathroom Fan Screaming or Silent? It Might Be Time for a New Motor
Your bathroom exhaust fan is one of the most important, yet frequently overlooked, appliances in your home. By drawing out moisture, steam, and odors, it prevents mold, mildew, and wood rot from taking over your bathroom. However, when you flip the switch and hear a deafening screech, a sad hum, or absolutely nothing at all, your fan’s motor is likely crying out for help.
A failing bathroom fan motor is a common household issue, but it doesn't mean you need to tear out your ceiling to install an entirely new fan unit. In most cases, you can easily swap out the motor itself, saving you time, money, and drywall repair. Let’s dive into how to diagnose a dead motor and how you can replace it yourself in just a few simple steps.
Signs Your Bathroom Fan Motor is Failing
How do you know if the problem is actually the motor and not a wiring issue or a clogged vent? Look out for these common warning signs:
Loud Screeching or Grinding: This is the most common symptom. Over time, the bearings inside the motor dry out, wear down, and begin to grind. This results in a high-pitched squeal or a loud vibration that makes using the bathroom unbearable.
The Fan Just Hums: If you turn on the switch and hear an electrical hum, but the blades aren’t spinning, the motor is getting power but is seized. Sometimes you can kickstart it by gently pushing the blade with a pencil, but this is a temporary fix—the motor needs to be replaced.
Slow Start-Ups: If the fan takes several seconds or minutes to get up to speed, the motor winding or bearings are failing.
Complete Silence: If the fan doesn't turn on at all, and you’ve verified that the circuit breaker hasn't tripped, the motor has likely burned out completely.
Why Do Bathroom Fan Motors Burn Out?
Bathroom fan motors operate in a harsh environment. Every time you take a hot shower, the fan draws in warm, humid air laden with dust, lint, and hairspray. Over time, this mixture creates a sticky grime that coats the motor and blower wheel.
This buildup acts as insulation, trapping heat inside the motor. Since these small motors are cooled by air movement, the excess heat eventually bakes the internal lubrication and burns out the electrical windings. Regular cleaning can prolong the life of your motor, but eventually, age and wear will take their toll.
The DIY Fix: Replacing the Motor vs. the Whole Fan
Many homeowners assume that a broken bathroom fan requires a call to an electrician or a contractor to replace the entire housing. This is a common misconception. Replacing the entire housing involves cutting drywall, crawling into the attic, and rerouting ductwork.
Instead, you can simply replace the motor assembly. The motor, bracket, and blower wheel (often called the scroll wheel or impeller) usually unplug and slide right out of the metal housing. You can purchase a replacement motor that matches your fan’s model number for a fraction of the cost of a full replacement.
Step-by-Step Bathroom Fan Motor Replacement
Replacing a bathroom fan motor is a highly manageable DIY project that takes less than thirty minutes. Before you begin, make sure to turn off the power to the bathroom at your home's main breaker panel to ensure your safety.
First, remove the plastic grille cover. Most covers are held in place by two metal torsion springs. Gently pull the cover down, squeeze the springs together, and release them from the slots in the housing.
Next, unplug the motor from the internal electrical outlet inside the housing. If your fan is hardwired, you will need to turn off the breaker, open the junction box, and disconnect the wire nuts.
Once unplugged, look for the mounting bracket holding the motor in place. This is typically secured by a couple of screws or pressure tabs. Remove the screws or release the tabs to slide the entire motor and bracket assembly out of the ceiling housing.
Now, transfer the blower wheel and bracket to your new motor, or install your pre-assembled replacement unit. Slide the assembly back into the housing, secure it with the screws, plug it back into the internal outlet, and reinstall the grille cover. Turn the power back on, and your fan should run quietly and efficiently once again.
For a detailed, visual walkthrough of this repair, you can watch this step-by-step video guide on How to Replace a Bathroom Exhaust Fan Motor. It will show you exactly what to expect when you take down your old fan motor.
How to Find the Correct Replacement Motor
To get the right replacement, you will need to identify the manufacturer and model number of your exhaust fan. This information is usually printed on a silver label inside the metal housing, which you can see once you remove the plastic cover. Common brands include Broan, NuTone, Panasonic, and Delta.
Once you have the model number, you can easily search for the exact OEM (Original Equipment Manufacturer) replacement motor or a compatible universal motor kit. Replacing just the motor is an eco-friendly and budget-friendly way to keep your bathroom dry, fresh, and mold-free for years to come.