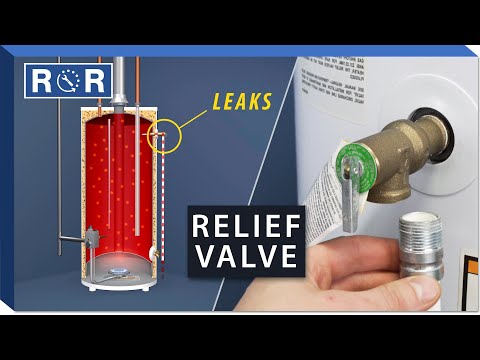
Water Heater - Pressure Relief Valve
Understanding Your Water Heater Pressure Relief Valve: Why It Matters and When to Replace It
When it comes to home appliances, few things are as essential—or as potentially dangerous if neglected—as your water heater. Tucked away in the corner of your basement or utility closet, it quietly provides hot showers and clean dishes day after day. But have you ever looked closely at the safety devices keeping that system in check? Chief among them is the Temperature and Pressure (T&P) relief valve.
This small but mighty component is your water heater's ultimate safety net. Understanding how it works, recognizing the signs of failure, and knowing when to take action can save you from costly property damage and catastrophic tank failure.
What is a Pressure Relief Valve and How Does It Work?
A water heater pressure relief valve is a safety device designed to release excessive pressure or temperature buildup inside the tank. Water expands as it heats up. Normally, this expansion is managed by an expansion tank or system plumbing, but if your thermostat malfunctions, the water can overheat, turning into steam and causing internal pressure to skyrocket.
If the pressure exceeds the valve's rating (typically 150 PSI), the spring-loaded mechanism inside the T&P valve opens automatically, allowing water or steam to escape. This safely vents the pressure before the tank can rupture or explode. Because water heaters operate under high pressure, a working relief valve is not just a convenience—it is a mandatory safety feature required by plumbing codes.
Common Signs Your T&P Valve Needs Attention
Like any mechanical part, pressure relief valves can wear out, corrode, or get clogged with mineral deposits over time. Ignoring a faulty valve is a gamble you don't want to take. Here are the most common signs that your valve needs replacement:
1. Constant Dripping or Leaking: If you notice a steady trickle or continuous pooling of water coming from the discharge pipe connected to the valve, it’s a red flag. While a minor pressure spike can cause a momentary drip, a constant leak usually means the valve's internal seal has failed or your home's water pressure is simply too high.
2. Mineral Buildup and Corrosion: Hard water is notorious for leaving mineral deposits. Over years of use, calcium and lime can build up around the valve opening, preventing it from sealing tightly or freezing it in place so it cannot open when it needs to.
3. The Valve Fails the Manual Test: Plumbers recommend testing your T&P valve at least once a year. If you lift the test lever and water does not rush out of the discharge pipe, or if the valve continues to leak after you snap the lever back down, the valve is defective and must be replaced immediately.
How to Test and Replace Your Pressure Relief Valve
Testing your water heater's pressure relief valve is a straightforward maintenance task that every homeowner can tackle. For a clear, visual walkthrough of this process, check out this helpful guide on how to inspect and test your water heater's safety components. Watching a professional handle the process can give you the confidence you need before rolling up your sleeves.
If your test reveals a faulty valve, replacing it is a project you can complete in under an hour with basic plumbing tools:
Step 1: Turn off the power and water. Shut off the electricity to electric water heaters at the breaker box, or turn the gas valve to the "pilot" or "off" position for gas models. Next, shut off the cold water supply valve leading into the water heater.
Step 2: Relieve the pressure and drain some water. Open a nearby hot water faucet to relieve any lingering pressure in the system. Then, attach a garden hose to the drain valve at the bottom of the tank and drain out a few gallons of water so the water level drops below the level of the T&P valve.
Step 3: Disconnect the discharge pipe. Unscrew the PVC or metal discharge pipe connected to the outlet of the T&P valve.
Step 4: Remove the old valve. Using a pipe wrench, carefully unscrew the old pressure relief valve from the side or top of the water heater tank. Be prepared for a small amount of residual water to spill out.
Step 5: Install the new valve. Wrap the threads of the new, identical T&P valve with Teflon tape (plumber's tape) to ensure a watertight seal. Screw the new valve into the tank hand-tight, then snug it down securely with your wrench, making sure the discharge outlet points downward toward the floor.
Step 6: Reconnect and refill. Reattach the discharge pipe, close the tank drain valve, and turn the cold water supply back on. Once the tank is full and pressurized—check for leaks by opening a hot water faucet to bleed out trapped air—restore power or gas to the unit.
Keep Your Home Safe with Quality Appliance Parts
Your water heater works hard behind the scenes to keep your household running smoothly, and regular maintenance is the key to longevity. If your routine check reveals a worn-out T&P valve, don't put off the repair. Investing a small amount of time and money into a replacement part now protects your family and prevents catastrophic water damage down the road.
Ready to tackle your water heater maintenance? Browse our extensive inventory of OEM replacement parts, valves, and plumbing supplies to find the exact match for your appliance make and model today!