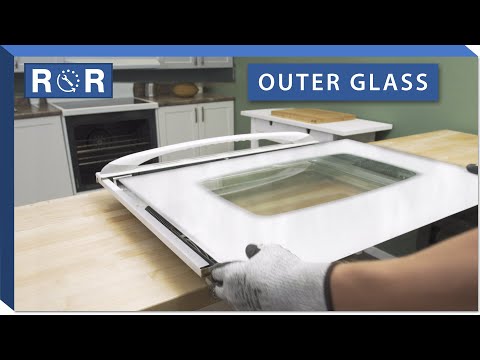
Oven Outer Door Glass
The Clear View to a Perfect Meal: Why Your Oven Outer Door Glass Matters
Ever peeked into your oven, eager to see your culinary masterpiece baking away, only to be met with a cracked, shattered, or foggy outer door glass? It's more than just an eyesore; a damaged oven door glass can compromise safety, efficiency, and the overall performance of your appliance. As the frontline barrier against intense heat, the outer door glass plays a crucial role in your oven's operation and your kitchen's safety.
In this comprehensive guide, we'll delve into everything you need to know about your oven's outer door glass, from why it might break to how you can replace it yourself. Get ready to restore that crystal-clear view and enjoy perfectly cooked meals once again!
Understanding Your Oven's Outer Door Glass
Your oven door isn't just a single pane of glass. Most modern ovens feature multiple layers of glass, creating an insulated barrier. The outer door glass is the outermost layer you touch and see, providing a protective shield, contributing to the oven's aesthetic, and helping to contain heat.
When this vital component becomes compromised, it affects more than just appearances. It can lead to heat loss, increased energy consumption, and even safety hazards.
Common Reasons Your Oven Outer Door Glass Might Break or Get Damaged
While oven glass is designed to withstand high temperatures, it's not invincible. Several factors can lead to its damage:
- Impact: Accidental bumps from heavy pots, pans, or even just a careless knock can cause cracks or shatters.
- Thermal Shock: This is a common culprit. Pouring cold water on a hot glass surface (e.g., during cleaning a spill) can cause rapid expansion and contraction, leading to stress fractures.
- Manufacturing Defects: Though rare, sometimes a subtle flaw in the glass can lead to breakage over time, especially when exposed to repeated heating and cooling cycles.
- Wear and Tear: Over many years, the glass can weaken, making it more susceptible to damage.
Is a Damaged Outer Oven Door Glass a Big Deal? Absolutely!
Ignoring a broken or cracked oven outer door glass is not recommended for several reasons:
- Safety Hazard: Sharp glass shards are an obvious danger, but even a small crack can compromise the door's integrity, potentially leading to larger pieces breaking off, especially during high-temperature cooking.
- Heat Loss and Inefficiency: The multiple layers of glass create an insulating barrier. A damaged outer pane compromises this insulation, allowing more heat to escape. This means your oven has to work harder to maintain temperature, leading to longer cooking times and higher energy bills.
- Aesthetics: A cracked or shattered door detracts from the look of your kitchen and your appliance.
- Compromised Cooking: Uneven heat distribution due to heat loss can lead to inconsistent cooking results.
Can You Replace Just the Outer Glass? (Yes, and It's Often DIY-Friendly!)
Good news! In most cases, you absolutely can replace just the outer door glass without having to buy an entirely new oven or even a whole new door assembly. This repair is often much simpler and more cost-effective than you might think, making it a popular DIY project for many homeowners.
Before You Begin: What You'll Need
To ensure a smooth and successful repair, gather these essentials:
- Replacement Outer Door Glass: This is crucial. Make sure to order the exact part for your oven's make and model number. Check your appliance's serial tag for this information.
- Screwdriver Set: You'll likely need Phillips and/or flathead screwdrivers.
- Work Gloves: Safety first! Protect your hands from broken glass.
- Soft Blanket or Towel: To protect your oven door while you work on it.
- Putty Knife or Scraper: To remove any old adhesive or sealant.
- Safety Glasses: To protect your eyes.
Step-by-Step Guide: Replacing Your Oven Outer Door Glass
While the exact steps can vary slightly by oven model, the general process is similar. Always refer to your oven's owner's manual for specific instructions.
Step 1: Safety First!
Disconnect power to the oven by unplugging it or turning off the circuit breaker. Allow the oven to cool completely if it was recently used.
Step 2: Remove the Oven Door
Most oven doors are designed to be removable for cleaning and service. Open the door fully, then locate the hinge locks (usually small clips or levers on the hinges). Flip these locks up or down according to your model's instructions. Then, partially close the door (usually to a 45-degree angle) and lift it straight up and out of its hinges. Place the door on a soft, protected surface (like a blanket on a table) with the outer side facing up.
WATCH A VIDEO: For a visual guide on how to remove an oven door and disassemble it, check out this helpful video. While it demonstrates an inner glass replacement, the initial steps of door removal and separating the door panels are often very similar for outer glass replacement.
Step 3: Disassemble the Door
Examine the oven door. You'll typically find screws along the top, bottom, or sides that hold the inner and outer panels together. Carefully remove these screws. Keep track of where each screw came from, as they might vary in size or type. Once the screws are removed, you can begin to gently separate the outer panel from the inner panel.
Step 4: Remove the Broken Glass
With the outer panel separated, you should now have access to the broken outer glass. Carefully remove any remaining glass shards, using gloves and safety glasses. Be thorough to ensure no small pieces are left behind. Clean any old adhesive or sealant from the frame where the new glass will sit.
Step 5: Install the New Outer Glass
Carefully place your new outer door glass into the designated frame. Ensure it sits flush and is properly aligned. Some models may require a gasket or sealant around the edges; if so, apply it according to the manufacturer's instructions for your replacement part.
Step 6: Reassemble the Door
Reverse the disassembly steps. Carefully align the outer panel with the inner panel and secure them with the screws you removed earlier. Do not overtighten the screws, as this can stress the new glass or the frame.
Step 7: Reattach the Door to the Oven
With the door fully reassembled, align the hinges with the slots on the oven body. Slide the door back into place, then flip the hinge locks back into their original position to secure the door. Test the door to ensure it opens and closes smoothly.
Step 8: Test Your Oven
Reconnect power to the oven. You can then perform a test bake cycle to ensure everything is functioning correctly and that there are no abnormal sounds or issues. Watch for any signs of heat escaping around the door.
Tips for Success and Preventing Future Damage
- Always Use Oven Mitts: This isn't just for handling hot items; it also minimizes the risk of accidental bumps against the glass.
- Avoid Thermal Shock: Never clean a hot oven door with cold water. Let the oven cool completely before cleaning the glass.
- Clean Carefully: Use non-abrasive cleaners and soft cloths. Avoid harsh chemicals or scouring pads that could scratch the glass.
- Regular Inspection: Periodically check your oven door for any signs of wear, loose screws, or small cracks that could worsen over time.
Restore Your Oven, Restore Your Confidence!
Replacing your oven's outer door glass is a rewarding repair that can extend the life of your appliance and restore your kitchen's functionality and safety. With the right part and a little patience, you can tackle this project yourself and get back to enjoying a clear view of your culinary creations. If you're ready to find the perfect replacement part for your oven, browse our extensive selection of genuine appliance parts today!