How to Use Plumber's Putty
Introduction to Plumber’s Putty: The DIYer's Best Friend
If you have ever stared underneath your kitchen sink and wondered how to stop a persistent leak around the drain basket, you are not alone. Plumbing repairs can feel intimidating, but many common household fixes require just a few basic tools and the right sealing compound. Enter plumber’s putty: a soft, pliable, clay-like substance that has been a staple in plumbing toolboxes for generations.
Despite its name, plumber’s putty isn't actually glue. Instead, it acts as a flexible, waterproof gasket that prevents water from seeping through joints and fittings. Whether you are installing a new sink strainer, mounting a bathroom faucet, or replacing a pop-up drain assembly, knowing how to use plumber’s putty correctly is a skill that will save you time, frustration, and costly plumbing bills.
What is Plumber’s Putty and When Should You Use It?
Plumber’s putty is an oil-based sealant designed to remain pliable over time, allowing it to withstand the natural expansion and contraction of plumbing fixtures caused by temperature changes. Because it doesn't harden permanently like silicone caulk or PVC cement, components sealed with putty remain easy to disassemble if you ever need to replace them down the road.
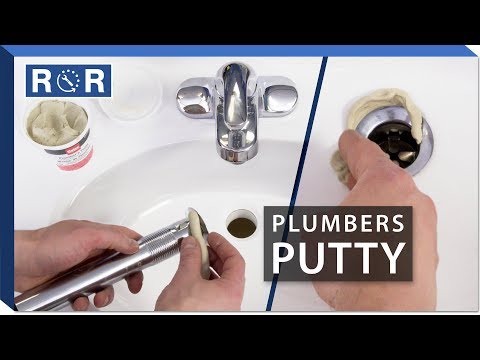
However, it is crucial to use plumber’s putty only where appropriate. It works exceptionally well on non-porous surfaces like stainless steel, porcelain, cast iron, and brass. It is ideal for sealing areas subject to water pressure *before* the water passes through a trap—such as around sink strainers, faucet bases, and waste assemblies. For a visual walkthrough on how to handle and apply this material effectively, check out this helpful plumber's putty tutorial video.
When NOT to Use Plumber’s Putty
While versatile, plumber’s putty has notable limitations. Most importantly, never use plumber’s putty on plastics like ABS or PVC. The oils in traditional putty can leach into plastic over time, causing it to dry out, become brittle, and crack. If you are working with plastic components, opt for a silicone-based sealant or the manufacturer-recommended gasket instead.
Additionally, avoid using plumber’s putty on porous materials like marble, granite, or natural stone. The oils in the putty can seep into the stone and leave permanent, unsightly discoloration. For natural stone countertops, a neutral-cure silicone or specialized marble-safe sealant is always the safer choice.
Step-by-Step Guide: How to Apply Plumber’s Putty Like a Pro
Applying plumber’s putty is a straightforward process, but taking your time ensures a watertight seal that will last for years. Follow these simple steps for a successful repair:
1. Clean the Surface: Before applying any putty, thoroughly clean the area where the fixture will make contact. Remove old, crusted putty, soap scum, rust, or debris using a putty knife and a rag. A clean, dry surface is essential for a proper seal.
2. Knead the Putty: Scoop out a golf-ball-sized amount of putty from the container. Roll and knead it between the palms of your hands just like playdough until it becomes warm, soft, and completely pliable.
3. Form a Rope: Roll the kneaded putty back and forth between your hands to create a long, even rope—roughly the thickness of a pencil (about 1/4 to 1/2 inch thick).
4. Apply the Putty: Press the putty rope firmly into the recess or around the underside lip of the fixture (such as the sink strainer flange). Make sure it forms a continuous, unbroken circle with no gaps where water could sneak through.
5. Set and Tighten the Fixture: Position the fixture into the mounting hole and press down firmly. The pressure will cause the putty to flatten out and squeeze into any tiny gaps. As you tighten the mounting nuts underneath, excess putty will squish out uniformly around the edges.
6. Clean Up the Excess: Use your fingers or a ball of leftover putty to dab up the excess material squeezed out during tightening. The sticky nature of the putty makes it easy to pick up stray bits. Wipe the area clean with a damp cloth, and your installation is complete!
Pro Tips for a Leak-Free Finish
To ensure your repair goes off without a hitch, keep these expert tips in mind. First, don't worry about waiting for plumber's putty to "cure" or "dry." Unlike caulk, it creates an immediate waterproof seal the moment you tighten the fixture, meaning you can turn the water back on right away. Second, if your putty feels too stiff or crumbly—which often happens if the tub has been sitting open in a cold garage—warm it up by kneading in a few drops of linseed oil or simply working it longer in your hands.
Mastering small repairs like replacing a sink drain with plumber’s putty is a great way to build your DIY confidence. However, if you run into stubborn, rusted-out hardware or complex plumbing issues that require specialized appliance parts, we are always here to help you find the exact components you need to get the job done right.