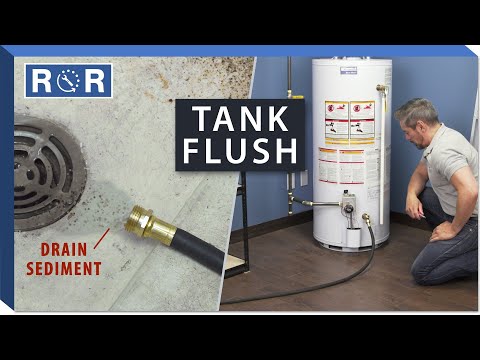
How to Drain & Flush a Hot Water Tank
Why You Need to Drain and Flush Your Hot Water Tank
If you haven’t thought about the inside of your water heater lately, you aren’t alone. Most homeowners treat these essential appliances as "set-it-and-forget-it" machines tucked away in a garage or basement. However, failing to perform basic maintenance can drastically reduce your unit's lifespan and efficiency.
Over time, minerals present in your water—especially calcium and magnesium—settle at the bottom of the tank. As these sediments heat up and cool down repeatedly, they harden into a thick layer of sludge or scale. This layer acts as a barrier between the burner (or heating element) and the water, forcing your water heater to work harder, run up your utility bills, and eventually fail prematurely. Draining and flushing your hot water tank once a year removes this buildup, keeping your water hot and your energy bills low.
Tools and Supplies You’ll Need
Before you dive into the project, gather the necessary gear. Having everything on hand will make the process go much smoother:
• A standard garden hose
• A flathead screwdriver (if your drain valve requires it)
• A bucket or large towel (for minor spills)
• Access to a floor drain, sump pump, or the outdoors to route the wastewater
Step 1: Shut Off the Power and Water Supply
Safety always comes first when dealing with home appliances and plumbing. If you have an electric water heater, turn off the breaker supplying power to the unit. If you have a gas water heater, turn the gas control valve to the "Pilot" or "Off" position. Letting electricity or gas run while the tank is empty can permanently damage the heating elements or the tank itself.
Next, locate the cold water shut-off valve—usually situated directly above the top of the water heater—and turn it to the closed position. This stops new water from entering the tank while you are trying to empty it.
Step 2: Cool Down the Water and Attach the Hose
Naturally, the water inside the tank is boiling hot and can cause severe burns. To avoid accidents, either turn off the water heater a few hours before you plan to drain it, or run a few hot water taps in your house until the water runs lukewarm.
Once the water is at a safe temperature, take your garden hose and screw one end tightly onto the water heater’s drain valve, which is located near the bottom of the tank. Route the other end of the hose to a safe drainage area, such as a floor drain, an exterior driveway, or a sump pit. For a visual walkthrough of this setup, check out this helpful video guide on draining and flushing a hot water heater.
Step 3: Open the Pressure Relief Valve and Drain the Tank
To help the tank drain smoothly without creating a vacuum, you need to open the temperature and pressure (T&P) relief valve. Lift the lever on the T&P valve located near the top of the tank (be prepared for a little bit of steam or water to release). Then, open the drain valve at the bottom of the tank using your screwdriver or built-in handle.
Allow the tank to empty completely. You may notice the water looking discolored, chunky, or muddy—that is simply the sediment and mineral scale washing out of the system.
Step 4: Flush Out Remaining Sediment
Just letting the tank drain isn’t always enough to clear out hardened scale. To get a truly thorough clean, you’ll need to flush the tank. With the drain valve still open and the hose connected, briefly turn the cold water supply valve back on for about 30 to 60 seconds.
The incoming high-pressure stream of cold water will churn up any remaining debris at the bottom of the tank and push it right out through your drainage hose. Keep an eye on the end of the hose until the water runs completely clear, then turn the cold water supply off again.
Step 5: Refill and Restart Your Water Heater
Now that your tank is clean and sediment-free, it’s time to reverse the process and get your hot water back online:
1. Close the drain valve tightly and disconnect your garden hose.
2. Close the T&P relief valve lever.
3. Open the cold water supply valve to begin refilling the tank.
4. Go to the nearest hot water faucet in your house (like a bathroom sink or bathtub) and turn it on to the hot position. This allows trapped air inside the plumbing lines to escape. Once water flows steadily from the tap without sputtering, turn the faucet off.
5. Finally, restore power to your electric water heater via the breaker box, or switch your gas control valve back to the "On" position.
By taking an hour out of your weekend to drain and flush your hot water tank, you will extend the lifespan of your appliance, improve its efficiency, and avoid costly emergency repairs down the road!