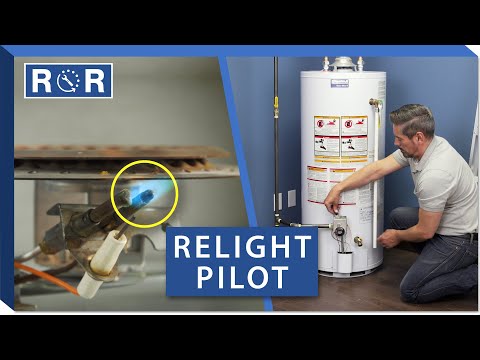
How to Relight the Pilot in a Water Heater
Why Did My Water Heater Pilot Light Go Out?
There is nothing quite as jarring as stepping into the shower only to be blasted with freezing cold water. If your tankless or standard gas water heater has stopped producing hot water, the culprit is often a pilot light that has blown out. Over time, drafts, a faulty thermocouple, or a buildup of debris can extinguish the tiny flame responsible for keeping your water warm.
Fortunately, relighting a water heater pilot light is a straightforward DIY maintenance task that most homeowners can accomplish in just a few minutes. Before you call a costly professional, grab a flashlight and follow this step-by-step guide to safely get your hot water flowing again.
Safety First: What You Need to Know Before You Begin
Because you are dealing with natural gas or propane, safety is paramount. If you open your utility closet and immediately smell a strong, sulfur-like odor of rotten eggs, stop and do not attempt to relight the pilot. A strong gas smell indicates a potential gas leak. Leave the house immediately, keep away from open flames or electrical switches, and call your gas utility company or a licensed plumber from a safe location.
If you don't smell gas, you are ready to proceed. It’s always a good idea to remove the outer and inner combustion chamber cover panels to inspect the area and ensure no flammable materials are stored near the appliance. For a visual walkthrough of these safety checks and the relighting process, check out this helpful guide on how to relight a water heater pilot.
Step 1: Locate the Gas Control Valve
Look near the bottom of your water heater tank for the gas control valve. You will typically see a dial or knob with three distinct settings: ON, OFF, and PILOT. In some modern water heaters, you may also see an igniter button (a red or black button next to the dial).
Turn the control knob from its current position to the OFF position. Once turned off, wait at least five minutes. This waiting period allows any residual gas trapped in the combustion chamber to safely dissipate into the air before you introduce a new spark or flame.
Step 2: Set the Valve to "Pilot" and Ignite
After waiting five minutes, turn the control knob to the PILOT setting. Press the knob down firmly and hold it. This action opens the gas valve, allowing gas to flow to the pilot assembly.
While continuing to hold the knob down, look for the igniter button (if your unit has one) and click it repeatedly until you see a small flame appear through the sight glass or viewing window at the base of the tank. If your older model water heater does not have an automatic igniter button, you will need to keep the knob depressed while carefully inserting a long-reach fireplace match or a click-lighter into the pilot burner access opening to light the flame manually.
Step 3: Hold and Verify the Flame
Once the pilot flame is lit, do not release the control knob immediately. You must continue to hold the knob down for approximately 30 to 60 seconds. This is a crucial step because the pilot flame must heat up a safety device called a thermocouple. The thermocouple generates a tiny electrical current that tells the gas valve it is safe to stay open.
After a minute, slowly release the control knob. Peek through the viewing window to see if the flame stays lit. If the flame goes out immediately after you let go of the knob, the thermocouple may be loose, dirty, or failing, and you may need to repeat the process or replace the part.
Step 4: Turn the Valve to "ON" and Test Your Hot Water
If the pilot flame remains burning steadily, congratulations! You have successfully relighted your water heater. Now, gently press down on the control knob slightly and turn it from the PILOT setting to the ON position.
Finally, replace any access panels you removed. Give the water heater about 15 to 30 minutes to heat the water inside the tank, and then test a nearby faucet to make sure hot water has returned. If your pilot light continues to go out repeatedly in the coming days, it’s likely a sign of a failing thermocouple or a venting issue that requires professional appliance repair parts and service.