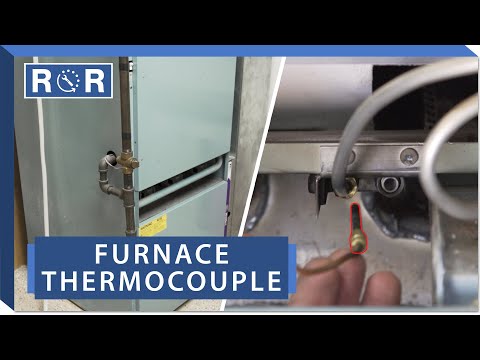
Furnace - Thermocouple
Understanding Your Furnace Thermocouple: The Small Part with a Big Job
Is your home feeling chilly even though your thermostat is cranked up? If you have an older gas furnace with a standing pilot light, the culprit behind your heating woes is often a tiny, inexpensive component called a thermocouple. When this safety device fails, your furnace's pilot light will not stay lit, preventing the entire heating system from kicking on and leaving you in the cold.
At its core, a furnace thermocouple is a simple thermoelectric sensor used to detect whether your pilot flame is lit. If it does not detect heat, it shuts off the gas supply to prevent dangerous gas leaks into your home. Understanding how this small part works, how to troubleshoot it, and how to replace it can save you from an expensive service call during the coldest months of the year.
How a Furnace Thermocouple Works
The thermocouple consists of a metal probe positioned directly in the flame of the pilot light. Inside this probe are two different types of metal wires joined at the tip. When the pilot light heats this junction, it generates a very small electrical current (measured in millivolts). This electric current travels down the copper lead to an electromagnet inside the gas control valve, holding the valve open.
As long as the pilot flame is hot and burning steadily, the thermocouple produces enough electricity to keep the gas valve open. If the pilot light goes out—whether from a draft, a gas interruption, or a system malfunction—the thermocouple cools down instantly. This stops the electrical current, causing the gas valve to snap shut and preventing raw gas from building up in your home.
Signs Your Thermocouple Needs Attention
The most common symptom of a failing thermocouple is a pilot light that goes out as soon as you release the reset button on your gas valve. You might hold the button down for the required 30 to 60 seconds to light the pilot, but the moment you let go, the flame dies. This indicates that the thermocouple is either not generating enough millivolts or is too dirty to sense the heat properly.
Other signs of trouble include a heavily soot-covered tip, a visibly bent or burned-out probe, or corrosion along the copper line. Over time, constant exposure to extreme heat and combustion byproducts will degrade the metal, making replacement inevitable.
Troubleshooting and Cleaning Your Thermocouple
Before buying a replacement part, you can try a quick troubleshooting step. Sometimes, a thermocouple is simply dirty rather than broken. Carbon and soot buildup can insulate the sensor from the heat of the flame, preventing it from generating the necessary electrical current.
To clean it, turn off the gas supply and the electrical power to your furnace. Once the area has cooled completely, use a piece of fine-grit sandpaper or emery cloth to gently buff the soot off the tip of the probe. Wipe it clean with a dry cloth and attempt to relight your pilot. If you want a visual guide on how to locate, test, and handle these delicate components safely, watch this helpful furnace thermocouple repair and replacement video.
How to Replace a Furnace Thermocouple
If cleaning the thermocouple does not solve the problem, it is time for a replacement. Fortunately, replacing a thermocouple is a straightforward DIY project that requires only basic hand tools, such as an open-ended wrench.
First, always prioritize safety: shut off the gas supply line to the furnace and turn off the breaker powering the unit. Locate the thermocouple, which is mounted next to the pilot light burner. Use your wrench to unscrew the nut holding the thermocouple line to the gas control valve, and then slide the sensor probe out of its mounting bracket near the pilot burner.
Take the old thermocouple with you to the store, or match its length online to ensure you get the correct replacement. Most universal thermocouples come in standard lengths like 18, 24, or 30 inches. Install the new probe into the bracket, gently bend the copper tube to route it to the gas control valve (being careful not to kink the line), and hand-tighten the nut into the valve before giving it a quarter-turn with your wrench. Turn the gas back on, check for leaks, and relight your pilot light.
When to Call a Professional
While replacing a thermocouple is an excellent DIY project for most homeowners, working with gas appliances always carries inherent risks. If you smell gas, if your furnace continues to malfunction after replacing the thermocouple, or if you feel uncomfortable working near the gas valve, do not hesitate to call a licensed HVAC technician. Keeping your home warm is important, but keeping your family safe is always the top priority.