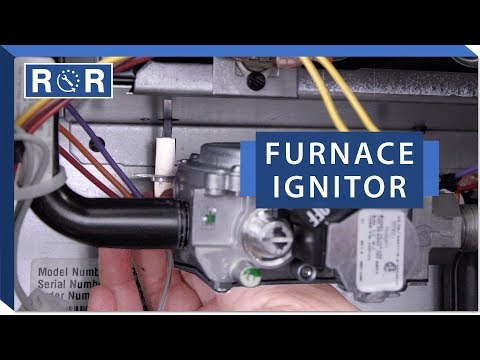
Furnace Not Igniting? - Ignitor Testing & Replacement
Why Your Furnace Is Blowing Cold Air: The Ignitor Connection
There is nothing quite as frustrating as waking up on a freezing winter morning only to realize your home is cold, and your furnace is blowing nothing but chilly air. When a gas furnace fails to heat, the culprit is very often a faulty hot surface ignitor. Much like the filament in an incandescent light bulb, a furnace ignitor has a limited lifespan. Over years of rapid heating and cooling cycles, the ignitor becomes brittle, cracks, and eventually fails to produce the spark or heat needed to light the burners.
Fortunately, diagnosing and replacing a bad furnace ignitor is a straightforward DIY project that can save you hundreds of dollars in professional HVAC service calls. In this comprehensive guide, we will walk you through how a furnace ignitor works, how to test it with a multimeter, and how to safely replace it to get your heating system back up and running.
How Does a Hot Surface Ignitor Work?
Modern gas furnaces have phased out standing pilot lights in favor of more energy-efficient electronic ignition systems. The most common type is the Hot Surface Ignitor (HSI). Made from durable but highly fragile materials like silicon carbide or silicon nitride, these ignitors function by receiving an electrical current when the thermostat calls for heat.
As electricity flows through the ignitor, it glows white-hot, reaching temperatures upward of 2,500°F. Once the ignitor reaches its peak temperature, the furnace's gas valve opens, releasing gas across the glowing element, which instantly ignites the burners. If the ignitor is cracked or worn out, electricity cannot flow through it, the element remains cold, and the furnace will shut down as a safety precaution.
Tell-Tale Signs of a Bad Furnace Ignitor
Before you pull out your tools, look for these common warning signs that point directly to a failing or failed furnace ignitor:
- The furnace runs but blows cold air: You can hear the draft inducer motor running and the blower fan active, but no warm air ever emerges from your vents.
- No visible glow: During the startup cycle, you do not see a bright orange or white glow coming from the burner area behind the furnace access panel.
- Short cycling: The furnace turns on, runs for a few seconds without igniting, and then shuts down completely, repeating this process several times.
- Tripped circuit breaker: A shorted ignitor can sometimes draw too much current, causing your home's electrical panel breaker to trip when the furnace tries to start.
- Visible physical damage: If you look closely at the ignitor element, you can often see small cracks, breaks, or dark burn spots indicating a localized burnout.
Safety First: Preparing for the Test
Working on a furnace involves both electricity and natural gas, making safety your absolute top priority. Before attempting any diagnostics or repairs, follow these critical safety steps:
First, turn off the electrical power to the furnace. You can do this by flipping the dedicated switch located on or near the furnace cabinet, or by turning off the corresponding breaker at your main electrical panel. Second, shut off the gas supply line leading to the furnace by turning the manual shut-off valve to the off position (perpendicular to the pipe). Finally, allow the furnace to cool down completely if it was recently running, as internal components can remain extremely hot.
How to Test Your Furnace Ignitor Using a Multimeter
To determine with absolute certainty whether your ignitor is dead or still functioning, you will need to perform a quick resistance test using a digital multimeter. For a detailed visual walk-through of this process, you can watch this helpful step-by-step ignitor testing and replacement video tutorial.
Follow these steps to test your ignitor:
Step 1: Access the ignitor. Remove the upper access panel of your furnace. Locate the ignitor, which is typically mounted near the burner assembly. It will have two wires leading to a plastic wiring harness plug.
Step 2: Disconnect the wire harness. Unplug the ignitor from the furnace's control board wiring harness. Avoid pulling directly on the wires; instead, squeeze the plastic release tabs on the plug and pull it apart gently.
Step 3: Set up your multimeter. Turn your digital multimeter to the lowest Ohms (Ω) setting for resistance, or set it to auto-ranging resistance.
Step 4: Test for resistance (continuity). Insert your multimeter probes into the two terminals of the unplugged ignitor connector. It does not matter which probe goes into which terminal slot.
Step 5: Read the results. A healthy furnace ignitor will typically show a resistance reading between 40 and 250 Ohms, depending on the manufacturer and model. If your multimeter displays "OL" (Open Line), "1", or infinity, it means there is a break in the electrical path. This indicates a dead ignitor that must be replaced.
Step-by-Step Guide to Replacing Your Furnace Ignitor
If your multimeter test confirmed that the ignitor is dead, or if you can see physical cracks in the element, it is time to install a replacement. Always ensure you purchase the correct OEM (Original Equipment Manufacturer) part or a certified universal replacement that matches your furnace model specifications.
Step 1: Remove the old ignitor. Use a screwdriver or nut driver to remove the mounting screws holding the ignitor bracket in place. Carefully slide the ignitor out of its mounting slot. Be extremely gentle, even with the broken ignitor, to prevent dropping fragments into the burner assembly.
Step 2: Handle the new ignitor with extreme care.Crucial Warning: Never touch the black silicon carbide or grey silicon nitride element of the new ignitor with your bare fingers. The natural oils on your skin will transfer to the element, creating a hot spot when the ignitor heats up. This causes the element to crack and fail prematurely, often within just a few weeks of installation. Always handle the ignitor by its ceramic base or wear clean gloves.
Step 3: Mount the new ignitor. Carefully position the new ignitor back into the burner housing, aligning the bracket with the screw holes. Hand-tighten the mounting screws first to ensure proper alignment, then secure them gently with your tool. Do not overtighten, as the ceramic base can crack under excessive pressure.
Step 4: Reconnect the wiring harness. Plug the new ignitor’s wiring connector back into the furnace harness. Ensure the connection clicks firmly into place.
Step 5: Reinstall the furnace panel. Put the furnace access door back on. Many modern furnaces have a safety door switch that must be fully depressed by the panel for the unit to receive power.
Testing Your New Ignitor
Now that the new part is securely installed, it is time to test your repair. Turn the gas supply valve back to the open position, and restore electrical power to the furnace at the breaker or switch. Set your home thermostat to "Heat" and raise the temperature setting above the current room temperature to call for heat.
Watch through the furnace's small inspection window. First, you should hear the draft inducer fan kick on to clear the heat exchanger. After a few moments, you should see the new ignitor begin to glow a bright orange-white. Shortly after the glow reaches peak brightness, you will hear a click from the gas valve, followed by the quiet roar of the burners igniting. Once the burners stay lit for more than a few seconds and the main blower begins pushing warm air through your vents, your repair is complete!