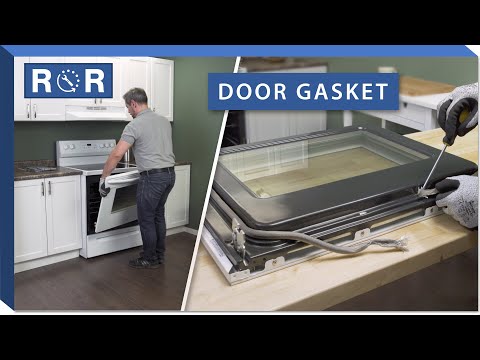
Oven Door Gasket
Is Your Oven Leaking Heat? The Humble Oven Door Gasket Might Be the Culprit!
There’s nothing quite like the aroma of a delicious meal baking in the oven. But what if your culinary masterpiece isn't cooking evenly, or your kitchen feels unusually warm when the oven is on? The culprit might be a small, often overlooked component: the oven door gasket. This unassuming strip plays a crucial role in your oven's performance, efficiency, and even your safety. Let's dive into everything you need to know about your oven door gasket.
What is an Oven Door Gasket and Why is it Important?
The oven door gasket is typically a flexible, heat-resistant seal, often made of rubber, silicone, or woven fiberglass, that runs along the perimeter of your oven door or oven frame. Its primary job is to create a tight seal between the oven cavity and the outside world when the door is closed. Think of it as your oven's weatherstripping.
Why is this seal so important? A properly functioning gasket ensures that the heat generated inside your oven stays inside. This leads to:
- Even Cooking: Consistent temperatures throughout the oven for perfectly baked goods and roasted dishes.
- Energy Efficiency: Your oven doesn't have to work harder (and consume more energy) to maintain its set temperature.
- Faster Preheat Times: Heat builds up and stays contained more effectively.
- Safety: Prevents hot air and steam from escaping, reducing the risk of accidental burns.
Signs Your Oven Door Gasket Needs Attention
Your oven gasket is constantly exposed to extreme temperatures, steam, and everyday wear and tear. Over time, it can degrade. Here are the tell-tale signs that it might be time for a replacement:
- Visible Damage: Look for cracks, tears, fraying, hardening, brittleness, or missing sections of the gasket.
- Heat Escaping: If you can feel significant heat radiating from around the oven door when it's closed and operating, your seal is compromised.
- Uneven Cooking: Hot spots or cold spots in your oven can be a direct result of heat leakage.
- Increased Energy Bills: An inefficient oven has to run longer and hotter to compensate for lost heat, leading to higher utility costs.
- Door Not Closing Properly: A damaged or warped gasket can sometimes prevent the oven door from closing completely or latching securely.
How to Inspect Your Oven Door Gasket
Regular inspection can catch issues before they become major problems. Here’s how to check your gasket:
- Visual Check: Open your oven door and run your fingers along the entire length of the gasket. Look and feel for any of the visible damage mentioned above. Pay close attention to corners and areas that see heavy use.
- The "Dollar Bill" Test: Close the oven door on a dollar bill (or a piece of paper). If you can easily pull the bill out, the seal in that spot is weak. Repeat this test at several points around the door.
For a practical demonstration of inspecting your gasket and even replacing it, check out this helpful video: How to Replace Your Oven Door Gasket.
Replacing Your Oven Door Gasket: A DIY Guide
Replacing an oven door gasket is a common and relatively straightforward DIY repair that can save you money and improve your oven's performance. Here's a general overview of the steps:
- Safety First: ALWAYS unplug your oven from the power outlet or turn off the circuit breaker before beginning any repair.
- Identify Your Oven Model: You'll need your oven's exact model number to order the correct replacement gasket. This is usually found on a sticker around the oven door frame, inside a drawer, or on the back of the appliance.
- Remove the Old Gasket: Gaskets are typically held in place by small clips, screws, or simply by friction. Carefully unhook or unscrew the old gasket, noting how it was attached.
- Clean the Channel: Use a damp cloth and mild detergent to clean any grease or debris from the channel where the gasket sits. Ensure it’s completely dry before installing the new one.
- Install the New Gasket: Carefully align the new gasket and push it into place, ensuring it's seated snugly and evenly all the way around. Make sure there are no twists or kinks. If it's a "friction fit" type, you might need to stretch it slightly to fit.
- Test the Seal: Once installed, close the oven door and perform the "dollar bill" test again to ensure a tight seal. Plug the oven back in and test for escaping heat.
The provided video offers excellent step-by-step guidance on removing and installing a new gasket, specifically for a Whirlpool oven, but the principles are widely applicable. Watch it here for visual assistance: Oven Door Gasket Replacement Walkthrough.
Maintenance Tips to Extend Your Gasket's Life
A little care goes a long way in prolonging the life of your oven door gasket:
- Gentle Cleaning: When cleaning your oven, be gentle around the gasket. Avoid harsh chemical cleaners or abrasive scrubbers, which can degrade the material. A damp cloth with mild soap is usually sufficient.
- Avoid Snagging: Be mindful when placing or removing large baking sheets or roasters, as they can snag and tear the gasket.
- Don't Use the Door as a Rest: Avoid resting heavy items on the oven door when it's open, as this can put undue stress on the gasket and hinges.
- Regular Inspections: Periodically check the gasket for signs of wear, as described above. Early detection can prevent more significant problems.
Don't let a faulty oven door gasket compromise your cooking or waste energy. With a quick inspection and, if necessary, a simple replacement, you can restore your oven's efficiency and ensure perfectly cooked meals every time. If you're unsure about tackling the repair yourself, or need help finding the right part, don't hesitate to contact our team of experts or browse our extensive selection of genuine appliance parts!