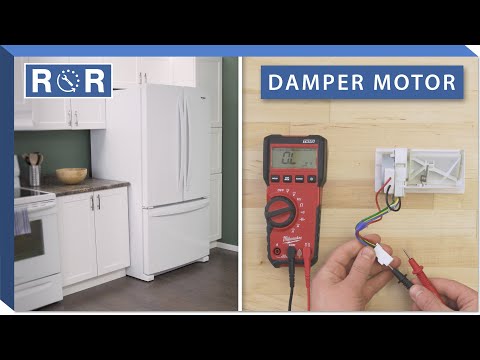
How to Test & Replace a Damper Motor (Refrigerator)
Is Your Refrigerator Temperature Acting Up? It Might Be the Damper Motor!
Few things are more frustrating than opening your refrigerator to find your fresh produce wilting or your milk not as cold as it should be. Conversely, finding items in your fresh food section unexpectedly frozen can be equally annoying. Often, the culprit behind these temperature inconsistencies is a malfunctioning component known as the damper motor. This small but mighty part plays a crucial role in regulating the airflow between your freezer and fresh food compartments. Don't rush to call a technician just yet – with a little guidance, you can often test and replace this part yourself, saving time and money.
Understanding Your Refrigerator's Damper Motor
So, what exactly is a refrigerator damper motor? Imagine a small gateway between your freezer and the main fresh food compartment. The damper is this gateway, and the motor is what controls its opening and closing. When your fresh food section needs cooling, the damper opens, allowing cold air from the freezer to flow in. Once the desired temperature is reached, the damper closes to prevent over-cooling. This precise control is essential for maintaining optimal temperatures in both sections of your refrigerator. A faulty motor can cause the damper to get stuck open or closed, leading to the temperature woes you're experiencing.
Is Your Damper Motor Failing? Common Symptoms
Recognizing the signs of a failing damper motor is the first step toward a solution. Here are the most common indicators:
- Uneven Cooling: Your fresh food section is warm, while your freezer is operating normally.
- Frozen Fresh Food: Conversely, the fresh food compartment might be too cold, even freezing items. This usually means the damper is stuck open.
- Unusual Noises: You might hear clicking, grinding, or buzzing sounds coming from the back or top of the fresh food compartment, particularly when the refrigerator is trying to adjust its temperature.
- Refrigerator Running Constantly: If the damper isn't working correctly, your compressor might run overtime trying to maintain a set temperature it can't achieve.
Safety First: Power Down Before You Begin!
Before you start any appliance repair, safety is paramount. Always, and we mean always, unplug your refrigerator from the wall outlet. Even if you're just doing a visual inspection, electricity and water don't mix, and moving parts can cause injury. Take this crucial step seriously.
Tools You'll Need for the Job
Gathering your tools beforehand will make the process much smoother:
- Phillips and/or Flathead Screwdrivers
- Nut Driver (if applicable, for certain models)
- Multimeter (for testing continuity/voltage)
- Replacement Damper Motor (ensure it's compatible with your refrigerator model)
- Pliers (needle-nose might be helpful)
- Work Gloves (optional, for comfort and grip)
Step-by-Step: Testing Your Refrigerator Damper Motor
Testing your damper motor can confirm if it's the source of your refrigerator's issues. The exact location and removal process can vary slightly by model, but the general principles apply.
- Access the Damper Assembly: The damper assembly is typically located inside the fresh food compartment, often at the top or back, where the cold air duct from the freezer enters. You may need to remove shelves, drawers, and an access panel (usually held by screws) to expose it. This video (around the 1:00 mark) provides a good visual of accessing a typical damper assembly and removing its cover.
- Visual Inspection: Once exposed, look for any obvious signs of damage to the damper blade or motor housing. Is the damper stuck in one position? Are there any visible broken wires or debris obstructing its movement?
- Disconnect the Wiring: Carefully disconnect the wiring harness leading to the damper motor. Most connectors have a tab you press to release them.
- Test for Continuity/Resistance (Motor Winding):
- Set your multimeter to the ohms (Ω) setting.
- Touch the multimeter probes to the terminals of the damper motor (where the wiring harness connected).
- A healthy motor winding should show a specific resistance reading (this can vary, but generally not an open circuit or zero ohms). If you get an "OL" (open loop) or infinite resistance, the motor's winding is likely broken, and the motor is bad. A reading of 0 ohms might indicate a short, also meaning the motor is bad.
- Test for Voltage (if applicable): This test should only be performed by those comfortable working with live electricity. With the refrigerator plugged back in (and the damper motor still disconnected), you can test the harness connector for voltage if you suspect the issue might be with the control board not sending power. Set your multimeter to AC voltage and carefully touch the probes to the terminals of the harness that plugs into the damper motor. You should see a voltage reading (often 120V AC, but check your model's specifications if unsure) when the refrigerator's control board signals the damper to operate. If there's no voltage when there should be, the problem might be with the control board rather than the damper motor itself.
Step-by-Step: Replacing Your Refrigerator Damper Motor
If your tests confirm the damper motor is faulty, it's time for a replacement. Remember to unplug the refrigerator again!
- Remove the Old Damper Assembly: Depending on your model, the motor might be part of a larger damper assembly. You'll likely need to unscrew the entire assembly from the refrigerator wall. The video demonstrates the removal of the assembly (around the 2:00 mark), which often involves a few screws and careful maneuvering to unclip it.
- Disconnect Wires and Sensors: If your new damper motor is a standalone part or if you're replacing the entire assembly, you'll need to transfer any sensors (like a thermistor) from the old unit to the new one. Carefully note their position and how they are attached. Disconnect all remaining wires.
- Install the New Damper Motor/Assembly:
- If replacing just the motor: Carefully detach the old motor from its housing/bracket and install the new one, ensuring it's properly seated and aligned with the damper blade mechanism.
- If replacing the entire assembly: Position the new damper assembly into the opening, ensuring any clips or alignment tabs fit correctly.
- Reconnect Wiring: Plug the wiring harness back into the new damper motor/assembly. Ensure the connection is secure.
- Reassemble the Refrigerator: Screw the damper assembly back into place, reattach any access panels, and put back shelves and drawers.
- Restore Power and Test: Plug your refrigerator back in. Listen for the damper motor operating and monitor the temperatures in both compartments over the next 24 hours to ensure proper function.
Still Having Trouble? Troubleshooting Tips
If you've replaced the damper motor and your refrigerator still isn't cooling correctly, consider these possibilities:
- Check All Connections: Double-check that all wiring harnesses are securely connected.
- Thermostat/Thermistor: A faulty thermostat or thermistor (temperature sensor) can send incorrect signals to the control board, leading to improper damper operation. The video also shows how to test a thermistor if you suspect that's an issue.
- Control Board: If the control board isn't sending the correct voltage to the damper motor, the motor won't operate, even if it's new.
- Other Airflow Issues: Ensure air vents aren't blocked by food items or frost buildup.
Get Your Fridge Back to Optimal Cooling!
Replacing a refrigerator damper motor is a common DIY repair that can save you the expense of a service call. By understanding its function, recognizing symptoms, and following these step-by-step instructions, you can restore your refrigerator to its optimal cooling performance. If you need a replacement damper motor or any other appliance part, be sure to visit our extensive online catalog. We have the exact parts you need to get your appliances running smoothly again!